A beautiful photo of a beautiful home can attract customers more than nearly anything else. And if you’re like most building and design pros, you have had many of your projects professionally photographed (and if not, it’s time to start). But are you just using those images in brochures, on your website, and on the walls of your conference room?
Here are a few more low-cost ways to use your projects and photos to market your company.
- Write a case study: What makes your home stand out in addition to looking pretty? What challenges did you have to overcome? How did you meet the needs of the client? Write a short story about your stand-out projects that explains what makes that home—and your company—special. Here’s an example. Once it’s written, you can:
–Post the case study with images to your website and/or blog; link to it from your e-newsletter
–Send the case study to your local news media (regional lifestyle magazines, the home section of your newspaper, etc.) as well as to the national trade magazines (Remodeling, Professional Builder, Qualified Remodeler, etc.) for their consideration for coverage.
–Turn it into a video walk-through to share on your web site and social media.
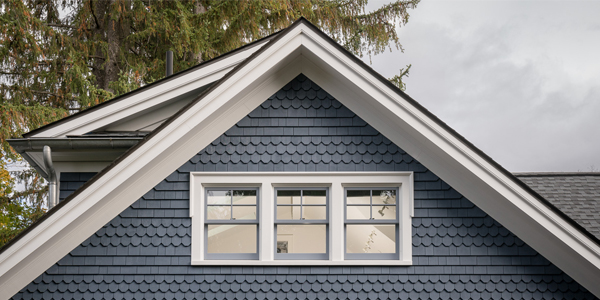
- Showcase your skills: When photographing your projects, don’t just take pictures of the overall home and rooms. Zero-in on the details that make it special—whether it’s a unique gable end detail, a hidden storage compartment in the kitchen, or an advanced-framed wall that will save energy costs.
–Share individual photos of those elements on social media calling attention to what’s unique.
–Share those photos/details with local and national media. Many publications not only cover full projects, but also like to highlight simple details or installation techniques. For example, NKBA magazine has a “Details” page for this exact purpose.
TRG Home Concepts showcases its custom capabilities and creativity by showing—and explaining—project details on Instagram.
- Share everywhere: Take advantage of every free platform at your disposal—Houzz, Instagram (posts and stories), Facebook, LinkedIn, Twitter, Pinterest. And use each platform’s unique written space wisely: Instagram is photo-heavy, so make captions catchy and to the point. LinkedIn is geared toward for pros, so think about what that audience cares about. Pinterest is a mecca for search, so be sure to use keywords when tagging those items. Facebook’s slide shows offer a chance to show a handful of pictures with meaty captions. Adjust accordingly!

GH Buildings Inc. showcases its projects on Instagram.
- Offer advice: Installing a unique detail or using a method that consumers can learn from? Take a video as you do so to educate viewers. This showcases your work while also positioning you as a leader.

Peter Brown Design creates animated YouTube videos detailing installation techniques, including “How to Attach a Patio Roof to an Existing House”
- Create an infographic: Does the exterior of the home or one of its rooms have a lot of unique elements or features that set your company apart? Create an infographic pointing out those elements and how they contribute to your and your client’s vision.
- Generate engagement: Got an in-progress project? Why not have your fans weigh in with their thoughts? On Facebook or through an Instagram story, post the exterior before the paint is chosen and offer a poll with two options for the paint color. Offer up two faucet choices to vote on. The more your fans interact with your social posts, the more they’ll get seen by non-followers, and polls are a great way to do that.
- Assemble trends: If you have a blog or newsletter, use your own projects (or combine your projects with some you find on Houzz) to assemble trend stories for your readers. For example, “6 Ways to Incorporate Red into Your Exterior” or “Tesla’s Solar Roof Tiles: We Tried Them.”

Design Build Pros offers trends and design advice on its blog.
- Enter contests: All of the national trade magazines have design contests that, if you win, provide lots of great, free publicity in addition to prestige and bragging rights. Professional Builder’s Design Awards are just one example.
- Create a look book: Follow the lead of fashion designers and create a look book that shows off your best work in an elegant, sophisticated way. Tie the theme of the look book back into your company’s mission statement and keywords.
- Partner with your favorite manufacturer: Project photos are also one of the best ways for manufacturers to market their products and, trust us, they’re always looking for good images to use in their own publicity. Reach out to your rep about sharing your project stories and photos with their marketing department; they could be perfect for the manufacturer’s own case studies, advertising, editorial, and social media—which means free publicity and recognition for you.
Want to share your Boral projects with us for consideration in our marketing efforts? Email Becky Duffy at becky.duffy@boral.com.