8 Quick Tips to Work Efficiently

As labor challenges abound and schedules remain tight, trimming inefficiencies out of your installation processes can add up to critical time and money savings. Every contractor has their tricks for eliminating wasted steps without sacrificing a quality install. Here are a few best practices to work efficiently.

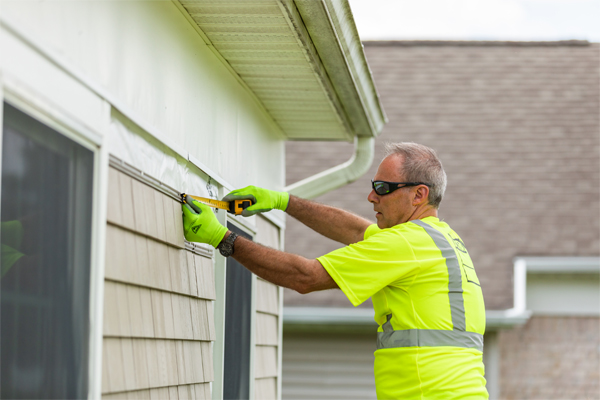
1. When installing vinyl siding, be sure to leverage available accessories that can reduce detail work while ensuring a finished look. These include:
• Dual undersill trim: This is used the same way as standard finish trim, such as under windows or at the top of the wall, but because it has two slots instead of one, there’s no guesswork as to whether you need to bump out the finish trim to keep the siding angles correct.

• Board and Batten Trim: Use this to separate the courses of vertical siding since the profiles can’t overlap at the seam. The Board and Batten Trim has built-in flashing, making installation easy as well as functional.

• Shake Finish Trim: Designed for Westlake Royal Building Products’ Portsmouth Shake Panel, Shake Finish Trim secures ripped panels under windows and doors or at the top of a wall. Use a snap-lock tool to create snap lugs about every 6” to 8”, then snap the panel into the Shake Finish Trim and lock the snap lugs into place securely.

2. If you have a damaged vinyl corner, you can replace it without removing any siding. Cut and remove the existing face, leaving the channels. Cut and remove the face of the new corner, leaving the return. Then snap the new corner over the channel of the old.

3. When installing CraneBoard® Solid Core Siding® insulated vinyl siding, keep the ends of the foam no more than ¼” from each other to retain the insulation value, while giving the panels enough room to expand and contract. Pull and use your measurements from the foam instead of the panel. Both the panel and the foam will be the correct length.

4. For deck stairs, Fulton Fine Woodworks created a wooden jig that fits between the deck boards and shows precisely where to pre-drill for screw placement, eliminating the need to measure. See it here.

5. Need to find center but working with an uneven number? Simple rotate your tape measure, like so: https://www.instagram.com/p/CfnFg3lJAHT/

6. Tim Uhler, lead carpenter at Pioneer Builders, often creates makeshift tools that can do tasks more quickly while reducing user strain and fatigue. For example, instead of bending to cut sheathing while framing walls on the ground, he mounted a floor scraper to a router with spiral bit: https://www.instagram.com/reel/CcuBh83gBzS/?utm_source=ig_web_copy_link

7. To lift heavy beams into place, Uhler made a beam wrench out of plywood: https://www.instagram.com/p/CZIt_NnKiU3/

8. When painting trim, Robert Cripps Construction sprays aerosol hairspray on the painters tape, helping to prevent bleed-through.

Want more pro tips to work efficiently? Check out our compilation on Instagram. Have a tip that can help others in the trades? Post it to Instagram and tag us at @WestlakeRoyalPros.

6 Tips for Selling Shutters

Selling shutters, exterior shutters

Shutters are an ideal finishing touch for most home exteriors. And with countless options across price points, styles, and colors, it’s easy for pros and consumers alike to find the perfect fit for each home. But that extensive selection also can become overwhelming, especially for homeowners. Dealers selling shutters can play a key role in helping customers narrow down their options and secure the best match.

Consider these sales strategies to support pros and DIYers:

Don’t start with price: The best way to begin the selection conversation is determining the customer’s functional and aesthetic needs. What are the most important attributes they’re looking for? Low maintenance? Do they favor a wood look? What design style are they seeking? Do they want operable or fixed units? These initial discussions will help point you and the customer toward a category and profile first.

Not only will this help customers find a product they like, it also can help you avoid providing price quotes for each and every feature. Determine what they want, then discuss pricing options.

Ramp up your knowledge: Between the number of options and the requirements for proper sizing, it’s critical that retailers selling shutters understand the nuances of materials, styles, and specifications. (See some of the mistakes your customers might make here.) Leverage your Westlake Royal Building Products’ sales reps—they’re your resource for training and questions. They also may be able to accompany you on the jobsite, present to the customer, and provide measuring and installation support.

Create displays: For homeowners, seeing and touching product options can help them realize the impact of adding shutters as well as decide between materials. If space allows, create a working façade showing a few of the most popular profiles. Work with your manufacturer to get hand samples of the options you offer, not only of the shutters themselves, but also the hardware.

Leverage color guides and design tools: Consult color guides available from Atlantic Premium Shutters and Mid-America components. In addition, dealers and their customers can use online design tools such as the Virtual Remodeler to see which shutter styles and colors will look best on their home and in combination with their siding, windows, roofing, and trim.

Ask customers to bring photos and examples: Choosing the right shutter style for the home can be confusing to buyers. Encourage them to bring a photo of their home so you can help determine which profiles will be best suited to the façade. In addition, they can bring Pinterest examples and other inspiration to guide the aesthetic conversation.

Relay the process: Homeowners may not understand the extended lead times required for custom colors and that shutters are often the last thing to be installed on the home’s exterior. Make sure to manage expectations by discussing the true delivery timeline.

Ready to learn more about shutter options? Explore Mid-America shutters and Atlantic Premium Shutters.

Westlake Royal Building Products Celebrates 300th Home with Habitat for Humanity 

Together with Habitat for Humanity – MidOhio, Westlake Royal Building Products recently celebrated a historic milestone with the dedication of the 300th home to feature the company’s donated siding and trim materials in the Ohio region. On Thursday, Sept. 15, the three-bedroom, two-bath single family home was dedicated and keys were turned over to the partner family in the South Linden neighborhood of Columbus.

Habitat for Humanity MidOhio home dedication

The dedication of this house marks the 300th siding donation that Westlake Royal has made to Habitat for Humanity – MidOhio over the last 20 years. For this home, Westlake Royal donated 20 squares of siding, including Exterior Portfolio® Vinyl Siding and Portsmouth™ Shake & Shingles Siding, as well as Royal® Shutters, Mounts and Vents accessories. Westlake Royal’s Columbus-based employees also donated their time and skills to help with installing the building products during the construction of the home this summer. 

Installing siding on a Habitat for Humanity MidOhio home.

“Amid inflation and rising costs, the need for affordable housing today is greater than it’s ever been. Westlake Royal is proud to be part of the solution in donating building products for good quality, single-family homes,” said Steve Booz, VP of Marketing & Product Management, Westlake Royal Building Products. “Our partnership with Habitat MidOhio dates back through several company name changes and decades, but our commitment to this organization and the community of Columbus remains unchanged.” 

“When we invest in housing, we invest in the future of the entire community. Thanks to the contributions of Westlake Royal, Habitat MidOhio has brought the dream of homeownership to 300 families,” said E.J. Thomas, President and CEO, Habitat MidOhio. “We are grateful for the generous support of our donors and volunteers, and look forward to continuing our work of providing quality, affordable housing to our family partners.” 

In January 2021, Habitat MidOhio celebrated the dedication of its 1,000th home. The organization works to bring people together to inspire hope, build homes, empower families, and develop communities. For the past 35 years, Habitat MidOhio has served families through new home builds/rehabs (437), owner-occupied home repairs (350), and tithe support to its sister affiliates in Africa (331). 

What Pros Should Know About Siding and Housewrap

The wall system is one of the most critical areas for preserving the home’s durability and longevity. And it’s just that—a system. Each part of the wall, from the cladding to the housewrap to the flashing, plays a role in keeping the wall system protected and dry. As such, it’s important to note that different types of siding may require different drainage systems behind them and, therefore, work best with specific types of weather resistant barriers (WRBs).

Cladding Material Influences Housewrap Selection

At minimum, one of the first steps in ensuring your wall works as a system is to follow local code requirements as well as instructions from your housewrap manufacturer and guidelines from your siding manufacturer for the specific cladding or claddings. The siding’s material and how it installs on the wall both factor into the decision of what WRB to choose.

For example, a wood or wood-based siding is much more prone to moisture absorption and will require a robust rainscreen system to ensure bulk water drains away quickly instead of absorbing into the siding, which can lead to premature failure. TruExterior® poly-ash siding, which is resistant to moisture but installs flat against the wall, is recommended to be paired with at minimum a drainable housewrap, which provides more drainage than a flat housewrap but less than a full rainscreen.

The Vinyl Siding Institute requires installing vinyl siding, such as that from Royal® Siding or Exterior Portfolio® with a weather resistive barrier. Because vinyl and polypropylene sidings are designed to allow the material underneath to breathe, they can be installed over a flat housewrap unless local codes require otherwise.

Housewrap, siding
This home features Royal® Vinyl’s Woodland siding in Heritage Blue and Portsmouth® Shake & Shingle accents.

Some cladding types feature a rainscreen already built in, as is the case with Versetta Stone® panelized stone siding. Because of this, the minimum recommendation is one layer of #15 felt.

Pay Attention to Transitions

With the growing trend of multi-textured facades, you’ll need to accommodate each type of cladding. When installing two products together that have different recommendations for housewraps and rainscreens, you’ll need to either wrap the entire façade in the more robust system or plan the wall system accordingly so that the corresponding weather barrier is positioned under each cladding and properly transitions from material to material per guidelines from the WRB and cladding manufacturers.

housewrap at transitions between vinyl siding and stone veneer
Versetta Stone’s wainscot cap/sill creates an ideal transition between the Versetta Stone panelized stone half wall and the Foundry Grayne siding above. Install flashing over the wainscot cap’s nailing fin and then shingle the other cladding over top to ensure water sheds off of the sill. Leave a small gap between the cladding and the stone, per each cladding’s installation instructions.

Flash Well

Follow all recommendations for flashing, as well, as some materials may require or recommend more robust flashing at the seams to prevent bulk water intrusion. Your installation instructions may also provide guidelines for step flashing along roof and wall lines to ensure water drains away rather than becoming trapped in the wall system.

Consult With Experts

Siding materials will shed the bulk of the water before it can reach the underlying wall assembly, but their main job is to make the house look good. Work closely with your housewrap and flashing manufacturer to ensure the wall system can properly manage any liquid water that may end up behind the siding so that the wall structure stays dry. Designing and installing a proper wall system can help protect the structure and its occupants while safeguarding the longevity of the home. 

Have questions about your siding installation and exterior wall system? Connect with us here.

5 Basic Steps Contractors Can Take to Jump-Start Search Engine Optimization (SEO)

Even if you’re preferred workspace is on the jobsite rather than behind the desk, it’s crucial as a building or remodeling pro to take the time to keep your website it proper working order, especially when it comes to search engine optimization (SEO). SEO is how you ensure your company website will appear in Google search results (and ideally at or near the top of those results) when potential customers are looking for contractors to build their home, remodel their kitchen, or replace their siding. Appearing in search results can help increase traffic to your website, build brand recognition, and ultimately grow your leads.

While SEO is complicated enough that there are folks whose jobs are solely dedicated to the practice,  there are a few basic steps you can take right now to ensure your company’s website is checking off the basic must-have features.

1. Ensure your contact info is up to date: Make sure your website has your current company name, address, and phone number, both on the contact page and in the static footer.

2. Update your Google Business Profile: If you haven’t claimed and updated your Google Business Profile, it’s critical that you do so right away. When potential customers search for your type of business, such as “siding contractors in Fairfax, Virginia,” having an up-to-date Google Business Profile will help ensure you appear in the results and are shown in the Google Map Pack (see image below)—which also means you’ll show up before all paid and organic listings.

SEO Google Map Pack

Keep your Google Business Profile updated with as much current information as you can, including contact information, hours of operation, photos of your location, and before/after project photos. Encourage your customers to write a Google review of your company so those results show up, as well. (Click here to learn more about Google Business Profile and what it does, and check out this article for step-by-step setup instructions.)

3. Use regional language: Make sure your website banner and content include your location and region. Consider what people search for (perhaps “siding contractor in Fairfax, Virginia”) and make sure you’re specifying those keywords.

4. Create original content: Google prefers websites with organic content, so create and maintain a blog if you can (see an example from Westlake Royal Building Products customer Boston Exterior Remodeling). Even a weekly post featuring design tips, reflections on the latest industry trends and topics, descriptions and images of recently completed projects, and other educational articles can give you a boost. Weave keywords related to your business, including regional references, into the content when practical. (For instance, an article on design trends may include “While dark exterior siding colors are trending nationwide, we find that our Fairfax, Virginia-area homeowners are still preferring classic white siding with dark trim.”)

If you want to dig further into the most popular keywords for your work areas, a tool like SEMrush provides research tools along with website and SEO analysis.

5. Ask for help: If you want to get beyond the basics, it can be helpful to hire an expert. A digital marketing agency or an independent consultant can evaluate your current website and fix any key problems without requiring a huge investment, freeing up your time to do what you do best—build.

If you want to dive deeper into these tips, check out Backlinko’s Definitive Guide to local SEO here.