How to Achieve Popular Board-and-Batten Siding Looks

Celect siding

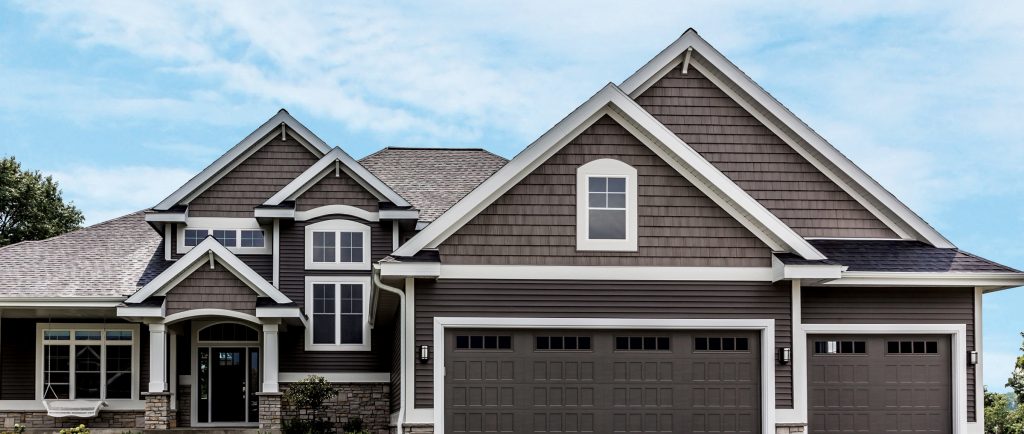
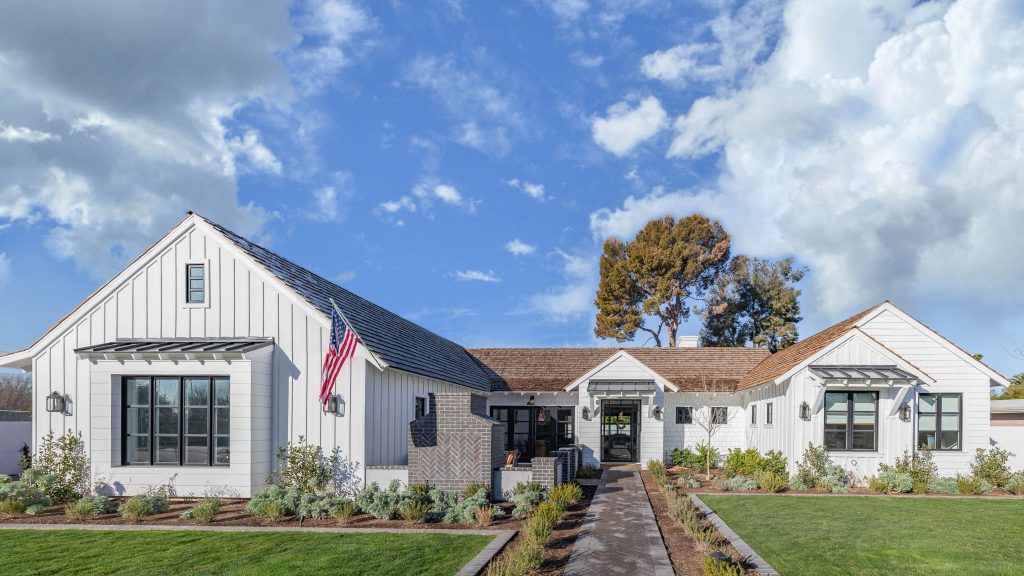
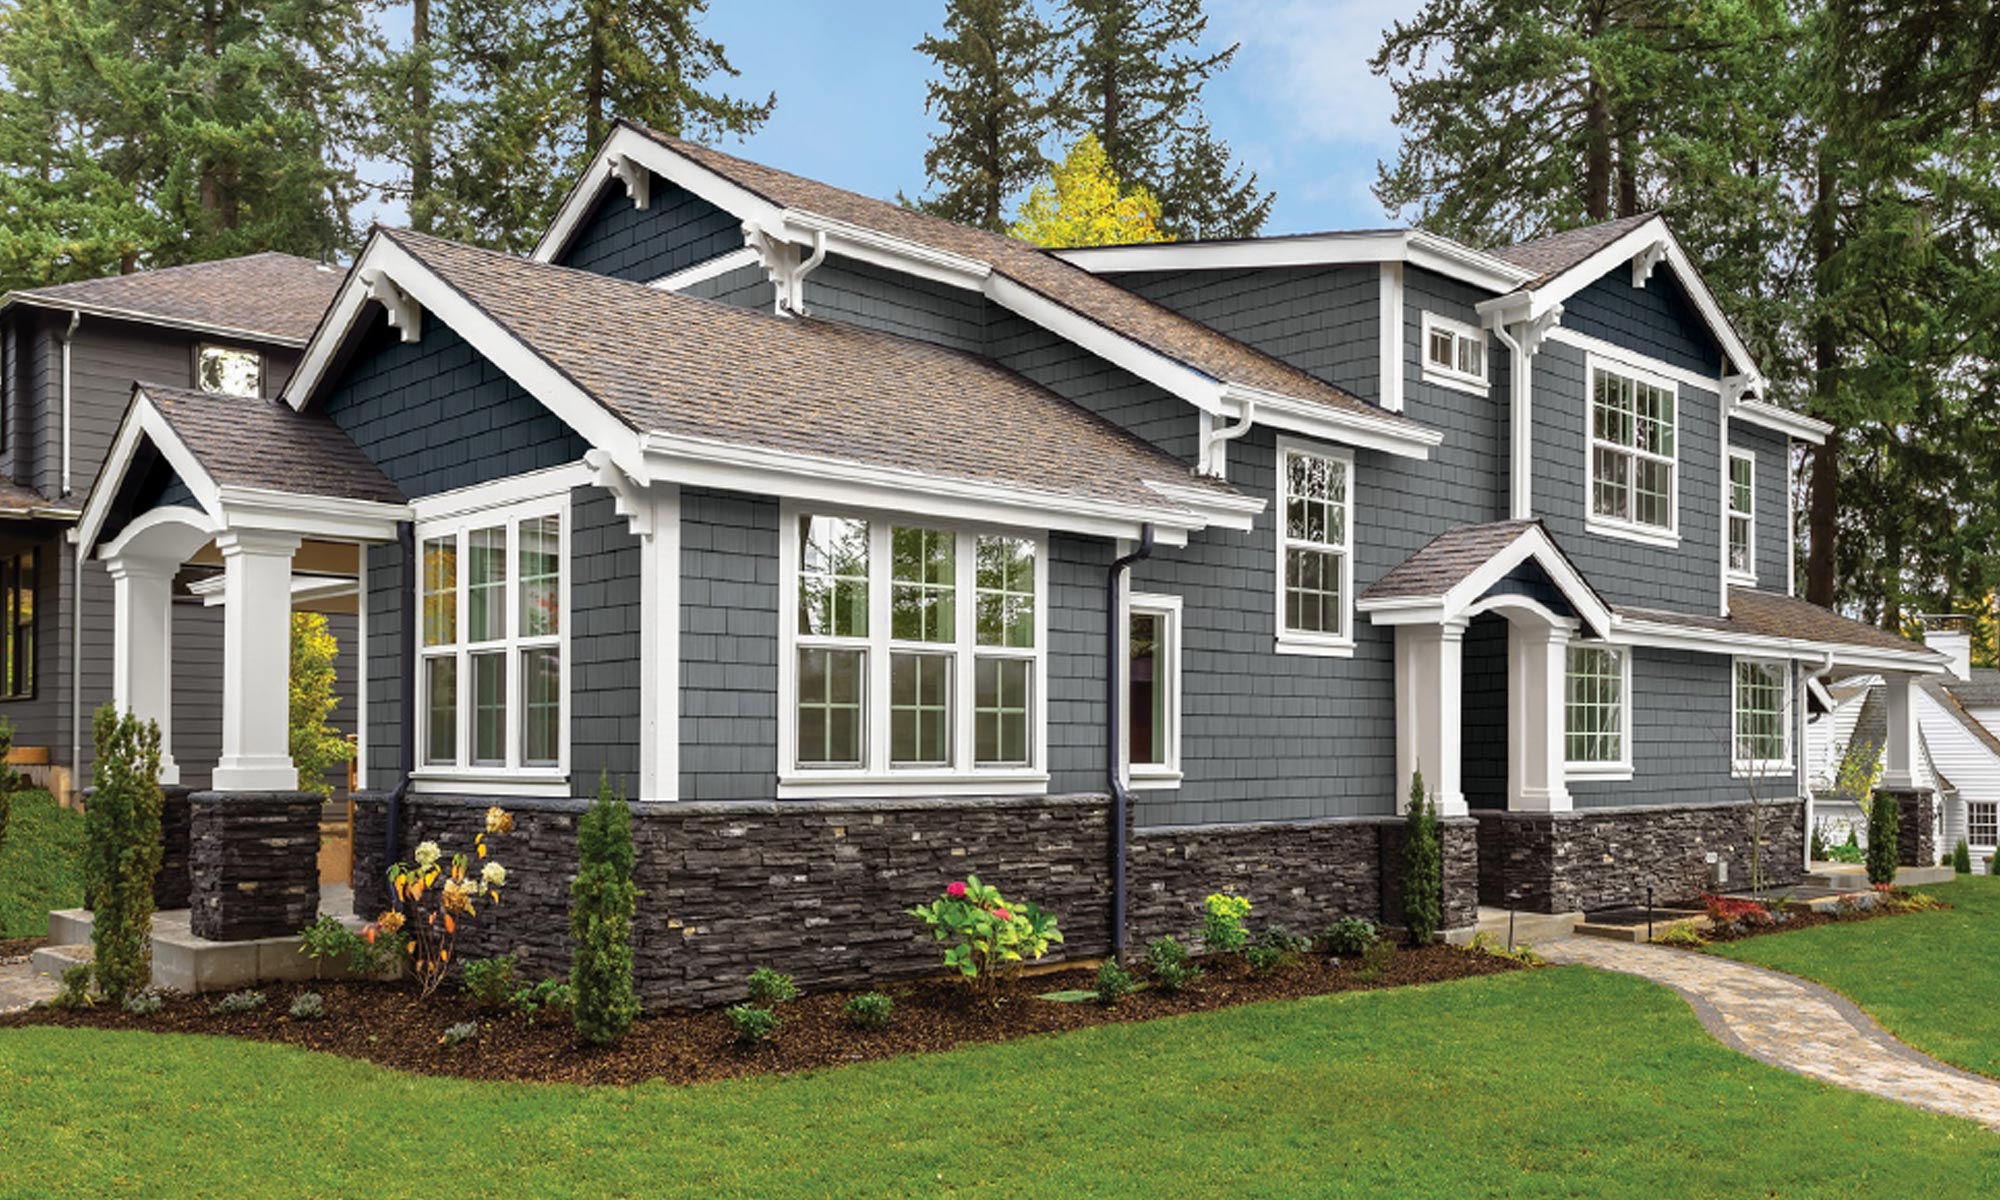
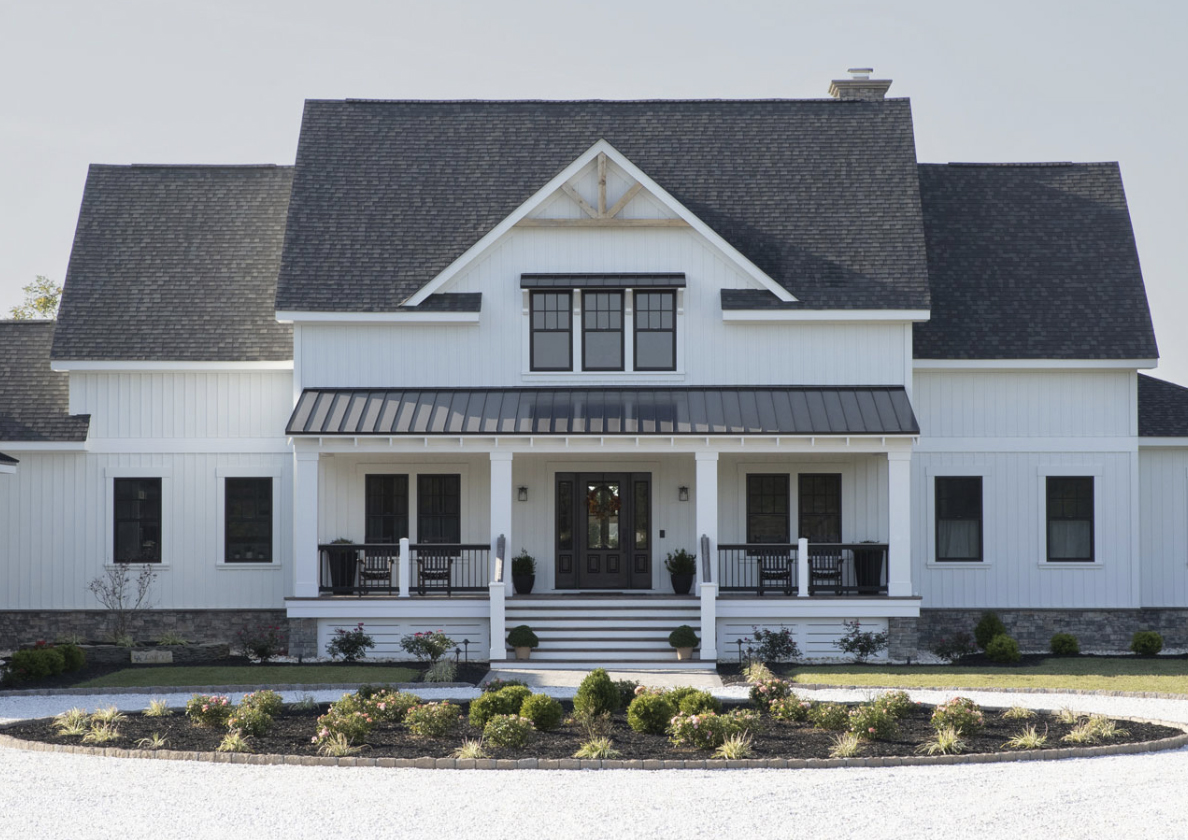
One of the biggest go-to trends in exteriors is board-and-batten siding. Due in part to the ongoing popularity of Modern Farmhouse styles, board-and-batten siding brings both charm and a modern edge, allowing some traditional designs to lean a bit more contemporary and fresh.

It’s also versatile: Apply board and batten to the full façade for a true Modern Farmhouse take, or use as an accent on a gable or bump out to add texture and dimension. For a nod to the style without the commitment, consider board-and-batten shutters in a bold color.

Celect Board and Batten Cellular Composite Siding in Carriage Red
Celect Board and Batten Cellular Composite Siding in Carriage Red.

Extensive Board-and-Batten Options

The good news for builders and homeowners alike is that achieving board-and-batten looks is easy and accessible, with a range of options across materials and price points. Many traditional panel siding manufacturers offer board-and-batten profiles, combining authentic looks without the associated maintenance of wood. For example, Exterior Portfolio® Board & Batten vinyl siding features a distinctive vertical pattern profile that conveys the genuine curb appeal of real wood while delivering as a streamlined, contemporary accent. The siding features Chromatix™ technology that helps keep colors from fading. Celect® cellular composite siding offers the look alongside wind resistance up to 210 mph and a Kynar Aquatec coating for enhanced UV protection.

For styles calling for wider or customized spacing than a panel product can provide, it’s easy to create the board-and-batten look with trim, such as TruExterior poly-ash trim, which provides the look of wood alongside high performance and dimensional stability to stand up to extreme weather, ground contact, and insects.

Board-and-batten siding, TruExterior Siding, exterior trends, poly-ash siding
Board and batten siding made with TruExterior poly-ash trim.

Board-and-Batten Installation Considerations

Unlike traditional vinyl and aluminum panel installation, vinyl and aluminum board-and-batten profiles install vertically. Installation instructions may vary from product to product, so be sure to follow manufacturer instructions, including requirements or recommendations for water-resistant barriers. Installers will need to account for some expected expansion and contraction, so the nails should not be driven completely flush.

Pre-planning is important for board-and-batten styles—you can’t just start on one side and go across, otherwise the look may appear off-center or you may end up with a small sliver at the end. Find the wall center and plan your layout accordingly.

Creating Board and Batten Siding With Trim

For wider or custom looks, create the board-and-batten façade using TruExterior Trim. Here’s how:  

• Due to the vertical installation, be sure to use a drainable housewrap between the siding and the wood sheathing to ensure moisture has a pathway to escape the wall cavity.

• Choose 1X, 5/8”, or 5/4” trim thickness. Which one is simply a preference for the homeowner and installer.

• For a traditional board-and-batten look, use 1×12 trimboard as the board and 1×3 trimboard as the batten.

• Find center on the wall and plan your layout to determine if it’s best to start with a batten or a board at that center point; you want to avoid having only a sliver of board when you reach the outer edges.

• Once you’ve chosen center board or center batten, start by installing a board first. If it’s a center board, mark the center of the wall, line up the board, and put it in place using 6D or 8D stainless steel or hot-dipped ring shank nails every 16” (and no less than 3/4” from the board edge) directly into the plywood or OSB.

• Install boards, moving away from center, leaving 3/4” of space between each board.

• After several boards are in place, chalk a single line 7/8” from the edge of the board left or right, which will designate the edge for the batten. This results in a 9-1/2” reveal between each batten.

• Apply a bead of caulk along each side of the batten or under each side of the batten.

• Install the battens using 6D or 8D stainless steel or hot-dipped nails every 16”.

• Repeat the process, moving outward from center.

Keep in mind that paying attention to your layout, and planning it out ahead of time, is important, particularly for small areas like gables. You want the surface to be as symmetrical as possible; if you have uneven board reveals on either side, it will be very noticeable, particularly on smaller surface areas.

DIYer Transforms Dining Room With Dramatic Stone Accent Wall

Versetta Stone accent wall

Lia, aka the Southern Yankee, has made a name for herself updating her farmhouse and sharing beautiful projects on a budget via her blog, Southern Yankee DIY. And it all started with a new accent wall in the dining room, which she transformed using Versetta Stone panelized stone siding.

The original dining room’s plain cream walls felt a bit ho-hum, so Lia opted to take the space to the extreme opposite, with a dark-gray wall. Rather than just paint, the DIYer chose to add texture and dimension using stone.

“I love the look of stone, especially when it’s in an interior setting,” Lia says. “I wanted to give the room something special and give it a feature. And it was so easy.”

With a lightweight, panelized format, Versetta Stone offered the ideal opportunity to create the look Lia wanted. The pieces can be cut to size outside and easily carried in. The panels connect with a tongue-and-groove system and then attach to the wall with screws, no mortar or mess required.

See the full install process in Lia’s blog post for Hometalk.

Lia chose the Ledgestone profile, a traditional dry-stack look, in Northern Ash, a strikingly bold dark gray hue.

Versetta Stone accent wall

“A lot of people are scared of darker colors,” Lia says. “They think it’s going to make a room feel dark or small. But I’ve found the opposite—it makes everything feel larger and more grand.”

The end result was an eye-catching accent that set the tone for the rest of the remodel. The wall became the base to inspire other parts of the home, carrying over to dark bookcases in the nearby living room and other touches.

“The whole process of installation was super simple,” Lia says. “It was a really fun project. And it’s one of those that people get intimidated by, but Versetta is simple to install and the look is so grand—it’s such a great feature in our home. We’re super happy.”

All images courtesy of Hometalk.

Best Practices for Multi-Textured Facades

Chester Celect 7” Clapboard and Celect 7” Shake

One of the most enduring trends in home exteriors today is multi-textured, varied facades. Homeowners and homebuyers tired of ho-hum, cookie-cutter houses are seeking out aesthetics to add an eye-catching pop that increases curb appeal and helps differentiate them from others on the block. For production builders, these changes can create a more appealing streetscape in communities with limited elevations.

There are a range of methods to create visual texture on the exterior façade, including blending different cladding and trim materials, mixing different profiles, and incorporating variations in color. Gables and bumpouts offer a logical place for shakes, vertical cladding, or complementary colors to elevate the façade’s dimensionality. Or consider a bold color or robust stone look for added drama.

Here are a few strategies to keep in mind as you experiment with multi-textured facades.

Play with Placement

Before you select colors and materials, take some time to play with placement. We recommend adding accent cladding (often shake, board and batten, or manufactured stone) in ways that highlight an architectural feature, like gables, a bumpout, or a new addition.

Create a Color Scheme

Working within a set color scheme will help you narrow down your cladding choices. Some homeowners may prefer to use different siding profiles in the same color to create subtle visual interest. Others like the look of complementary colors, or are interested in a high-contrast color scheme.

Exterior Portfolio siding creates a multi-textured facade
Similarly toned colors and small variations in texture help differentiate this facade from other traditionally styled homes. The cladding combines Exterior Portfolio Elm Grove D4 in Cypress and Country Beige, along with Exterior Portfolio Portsmouth D7 Cedar Shingles in the same hues and a subtle nod to the color scheme with tan window frames.

Incorporate Texture

A textured look can be made literally, such as from more robust materials like stone, or visually, from movement between materials and authentic, wood-like profiles.

One of the most popular ways to elevate the facade is with a half wall of stone—such as with Versetta Stone panelized stone siding, Cultured Stone manufactured stone veneer, or Atlas Stone composite stone panels—with traditional siding above. In fact, adding a manufactured stone kneewall is so popular it offers the second-highest return on investment for renovation projects, according to the Remodeling 2022 Cost vs. Value Report.

Eldorado Stone used as a kneewall to create a multi-textured facade
A stone kneewall, such as this one created with Eldorado Stone’s Tundra Brick in Ashland, adds subtle variation while delivering high return on investment.

The lighter weight of panelized or manufactured stone also makes it easy to create two-story accent walls with for a truly dramatic look.

Consider Resale

Resale value is always a concern when incorporating homeowners’ tastes and preferences, so it’s important to balance a look they love without adding elements that are too garish or that will quickly feel dated. Craftsman and Arts & Crafts looks never seem to fade from favor, for example, but a trendy color like burnt orange or avocado green likely will.

Versetta Stone blends with vinyl siding in similar tones to create a multi-textured facade
Colors don’t have to be boldly different to make an impact. The brown-gray tones of the Foundry Split Shake siding, stone, and garage doors create layers of visual texture that unfold slowly on this home.

For homeowners who want to put their unique stamp on things, consider areas of the exterior that are easier to change out before resale, such as a chartreuse entry door or bright red shutters. Porch furniture, flower boxes, and bright flower beds are other ways to add bolder colors without making a hefty long-term commitment.

Stay Within the Home’s Style

Similarly, always consider the home’s overall style when incorporating different materials and profiles. For example, while shake gables are a popular approach, the texture will feel off-putting on a Southwest home. Modern-style homes are more likely to have multiple materials versus traditional, older homes. But the popularity of Modern Farmhouse has allowed buyers to create more varied looks while holding on to some authenticity.

Multi-textured facade created with vertical and horizontal TruExterior siding
Vertical and horizontal TruExterior Siding, along with cedar-like shakes, create visual variation across this all-white exterior.

Don’t Forget the Exterior Accessories

Trim, shutters, and columns are an excellent way to infuse style and create variation in subtle ways. Dark trim is extremely popular, adding a dramatic look against white siding without going overboard.

Leverage Online Design Tools

With so many options, it can be overwhelming for pros and consumers alike to visualize how products and colors will look on the completed façade. Free online design tools, such as Westlake Royal Building Products’ Virtual Remodeler, HomePlay, and Dream Designer, allow you to preview different product combinations on an image of the home or a similar home. Users can mix and match siding materials, profiles, colors, and accessories, helping to better ensure confident product selections and a satisfying finished façade.

With a diverse, versatile portfolio of siding, trim, stone, and roofing brands, Westlake Royal Building Products makes it easy to create multi-textured facades. Learn more here.

Video: How to Make Common Trim Bends on a Tapco Tools Brake

Tapco Tools trim bend

Brakes and saw tables from Tapco Tools offer the utmost precision to create high-quality trim bends for the finished look of custom exterior trim. As the industry leader in premium professional-grade contractor brakes for more than 50 years, our tools and accessories are efficient, durable, portable, and easy to use. Plus, we back it up with robust training and unparalleled customer support.

Here’s a step-by-step look at some of the most common trim bends you can complete on a Tapco Tools brake.

The 4 Most Basic Shapes of Trim Bends:

Some of the most common bends on a brake that can get you nearly anywhere you need to go are hemming an edge, a sill seam, simple (3/4”) step flashing, and tight (1/2”) step flashing.


J-Channel and L-Bends

Making a J-channel on a Tapco brake is straightforward, and creating a window head flashing is a very similar process.

Bending Bay Window Corner Posts

Often, installers will try to stretch a vinyl siding corner at a 22- or 45-degree bay window. Here’s a better solution.

Ready to learn more about trim bends? View more how-to videos on our YouTube channel and click here to find the right brake for your operation.