Accommodating Expansion and Contraction in Vinyl Siding Installation

Exterior Portfolio siding creates a multi-textured facade

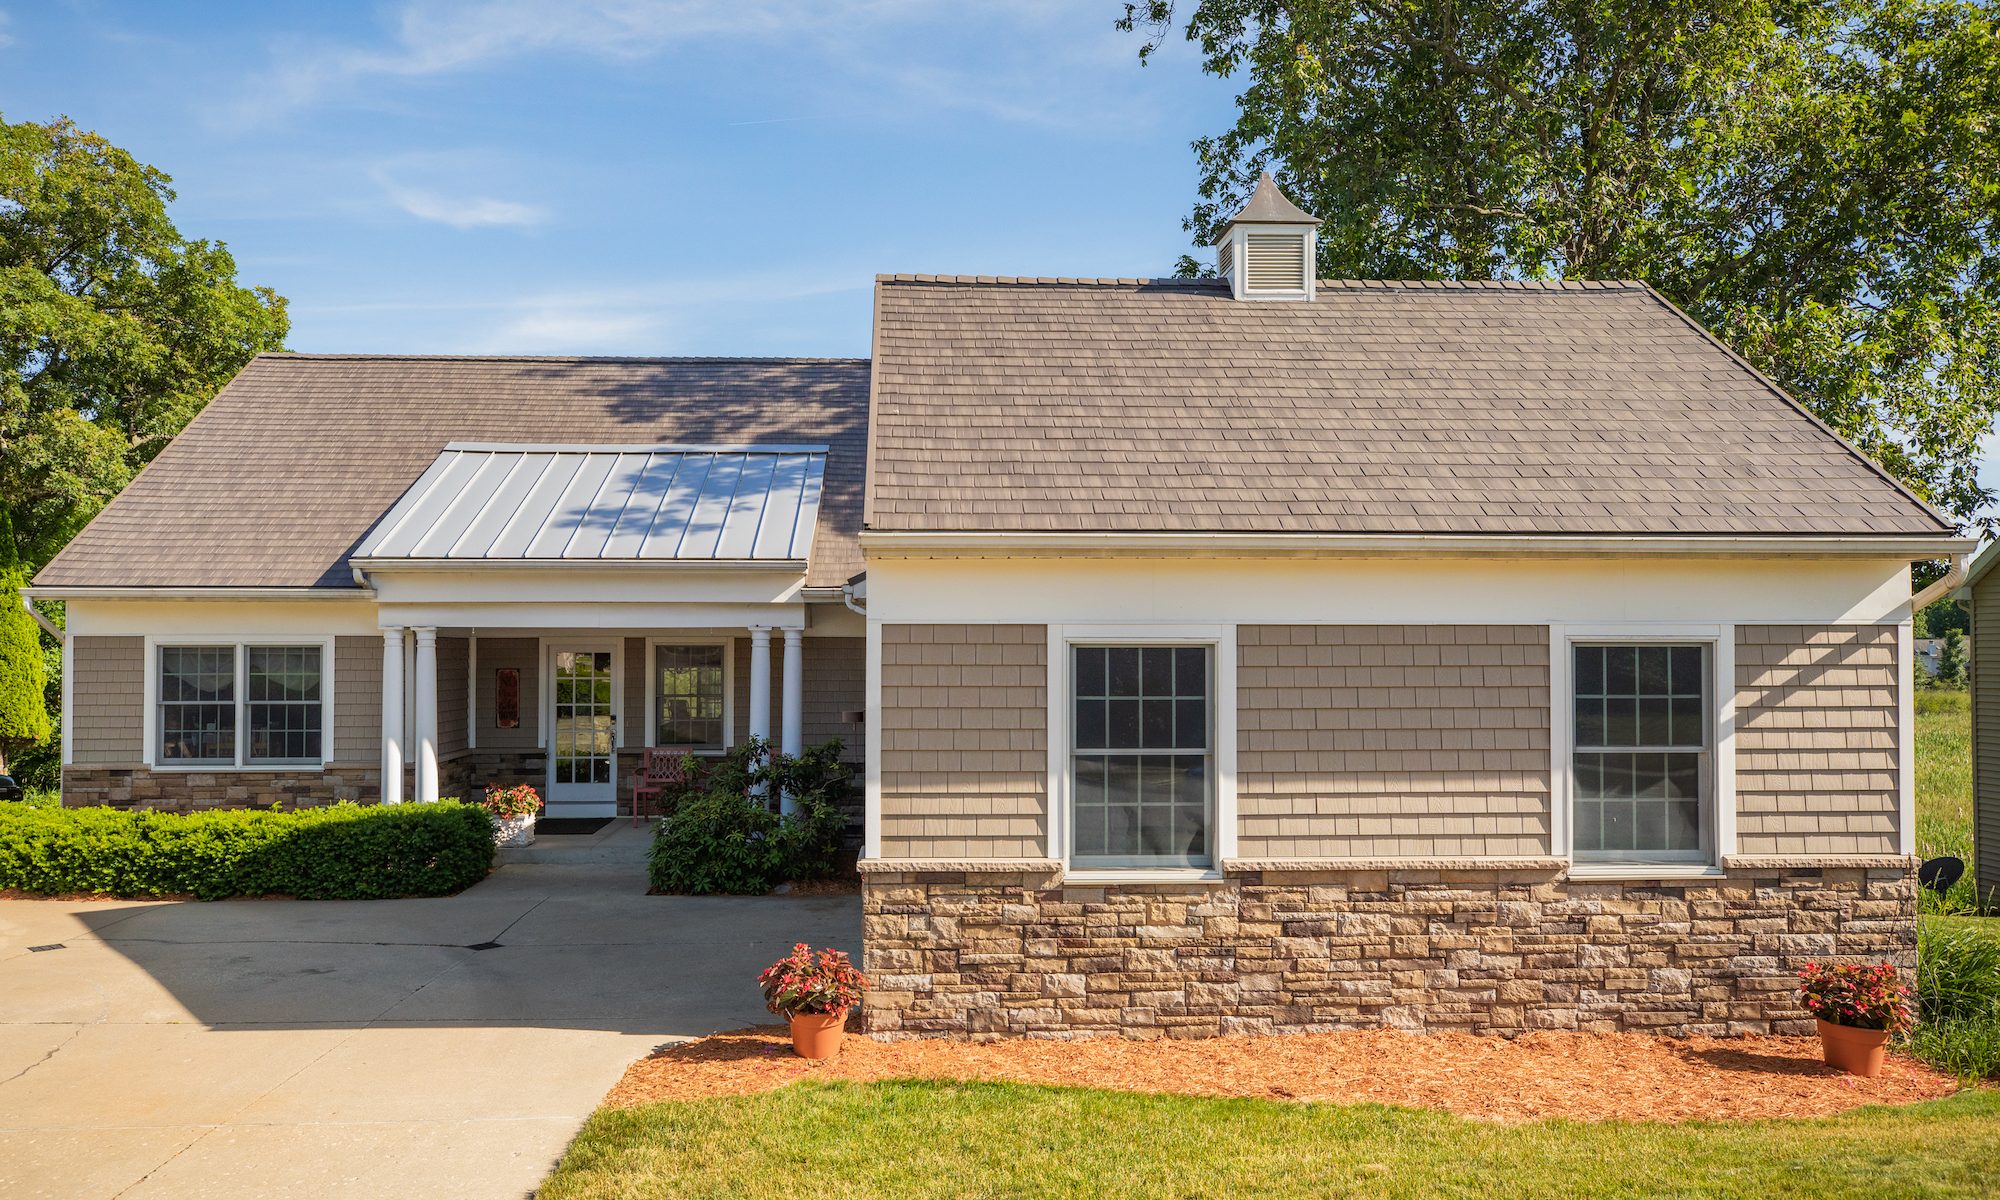
Vinyl siding is a fairly straightforward cladding to install, but, like any building material, it’s critical to follow proper vinyl siding installation procedures outlined by your manufacturer. And the No. 1 consideration to keep in mind? Managing expansion and contraction.

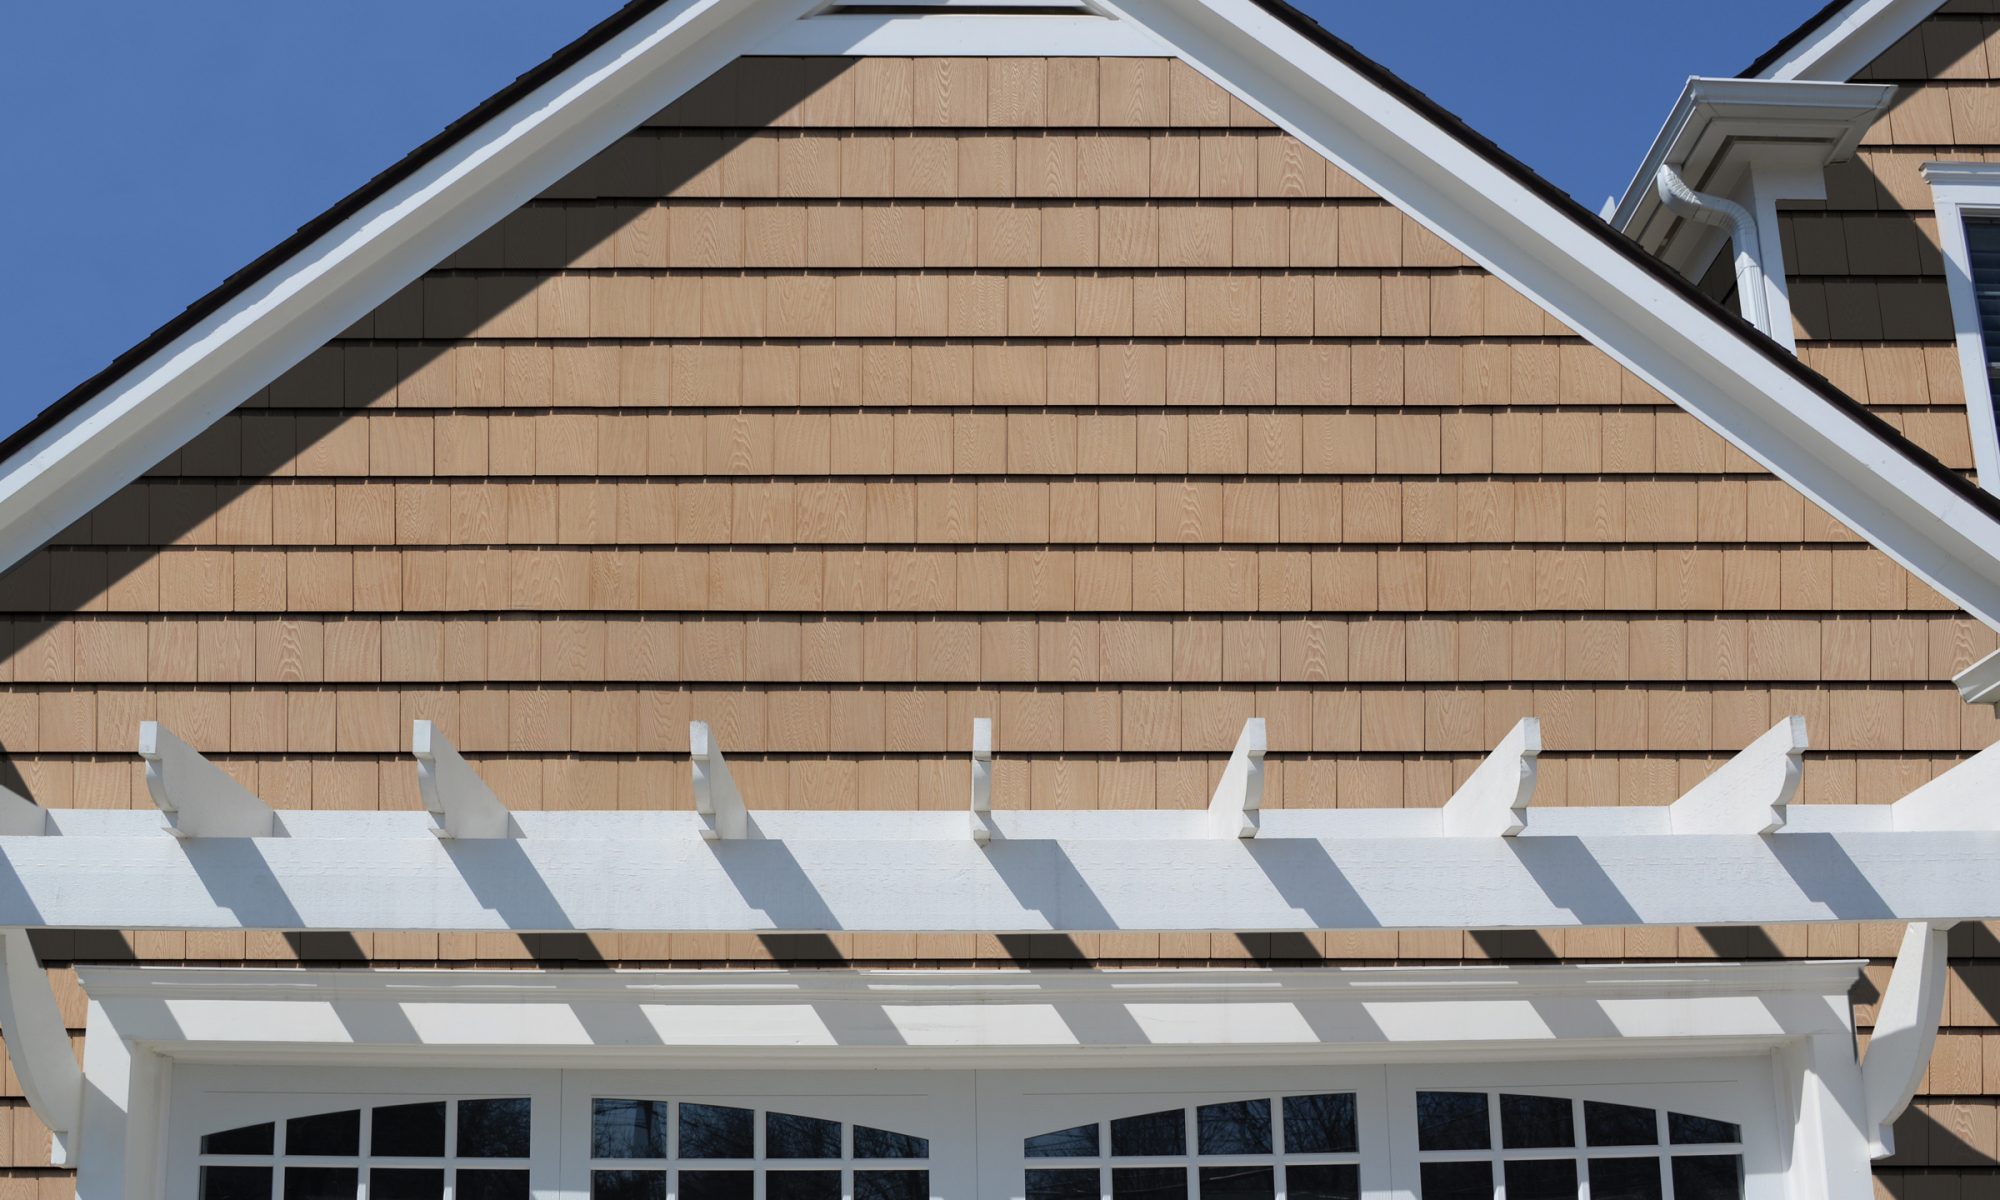
Nearly every material expands and contracts. And this phenomenon is one that’s easy to accommodate by following proper vinyl siding installation instructions. Vinyl siding manufacturers have designed their systems holistically to work well together, with a pocketed system design to hide any potential expansion and contraction of the materials.

The Potential Challenges of Expansion and Contraction

Like many PVC-based materials, vinyl siding will grow when it gets warm and shrink when it gets cold. A 12-foot vinyl siding panel could see a ½- to 5/8-inch difference in length between winter and summer. This basic principle drives nearly all installation guidelines for vinyl siding, and understanding the principle is important to ensure your exterior project looks as good as it should for years to come.

When you don’t accommodate for a siding panel’s potential movement, a number of things can happen. Nail the panel too tightly and it has no room to expand; this can result in rippling (also called oil canning) as the panel forces itself outward. A similar issue can occur if panels are too long on the ends. And if you  don’t trim the siding properly, visual gaps can appear as the panels contract.

Vinyl Siding Installation Strategies to Accommodate Expansion and Contraction

Avoiding these issues is fairly straightforward. Here are best practices to keep in mind:

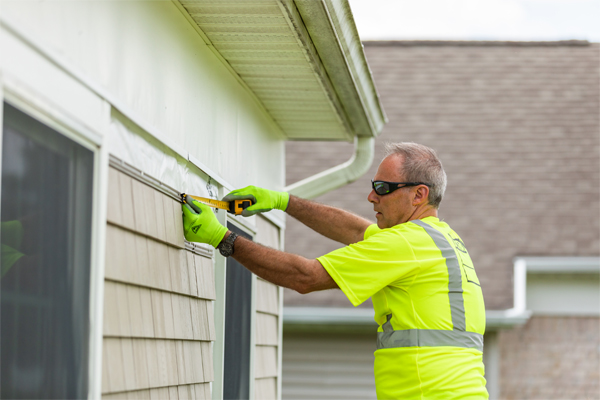
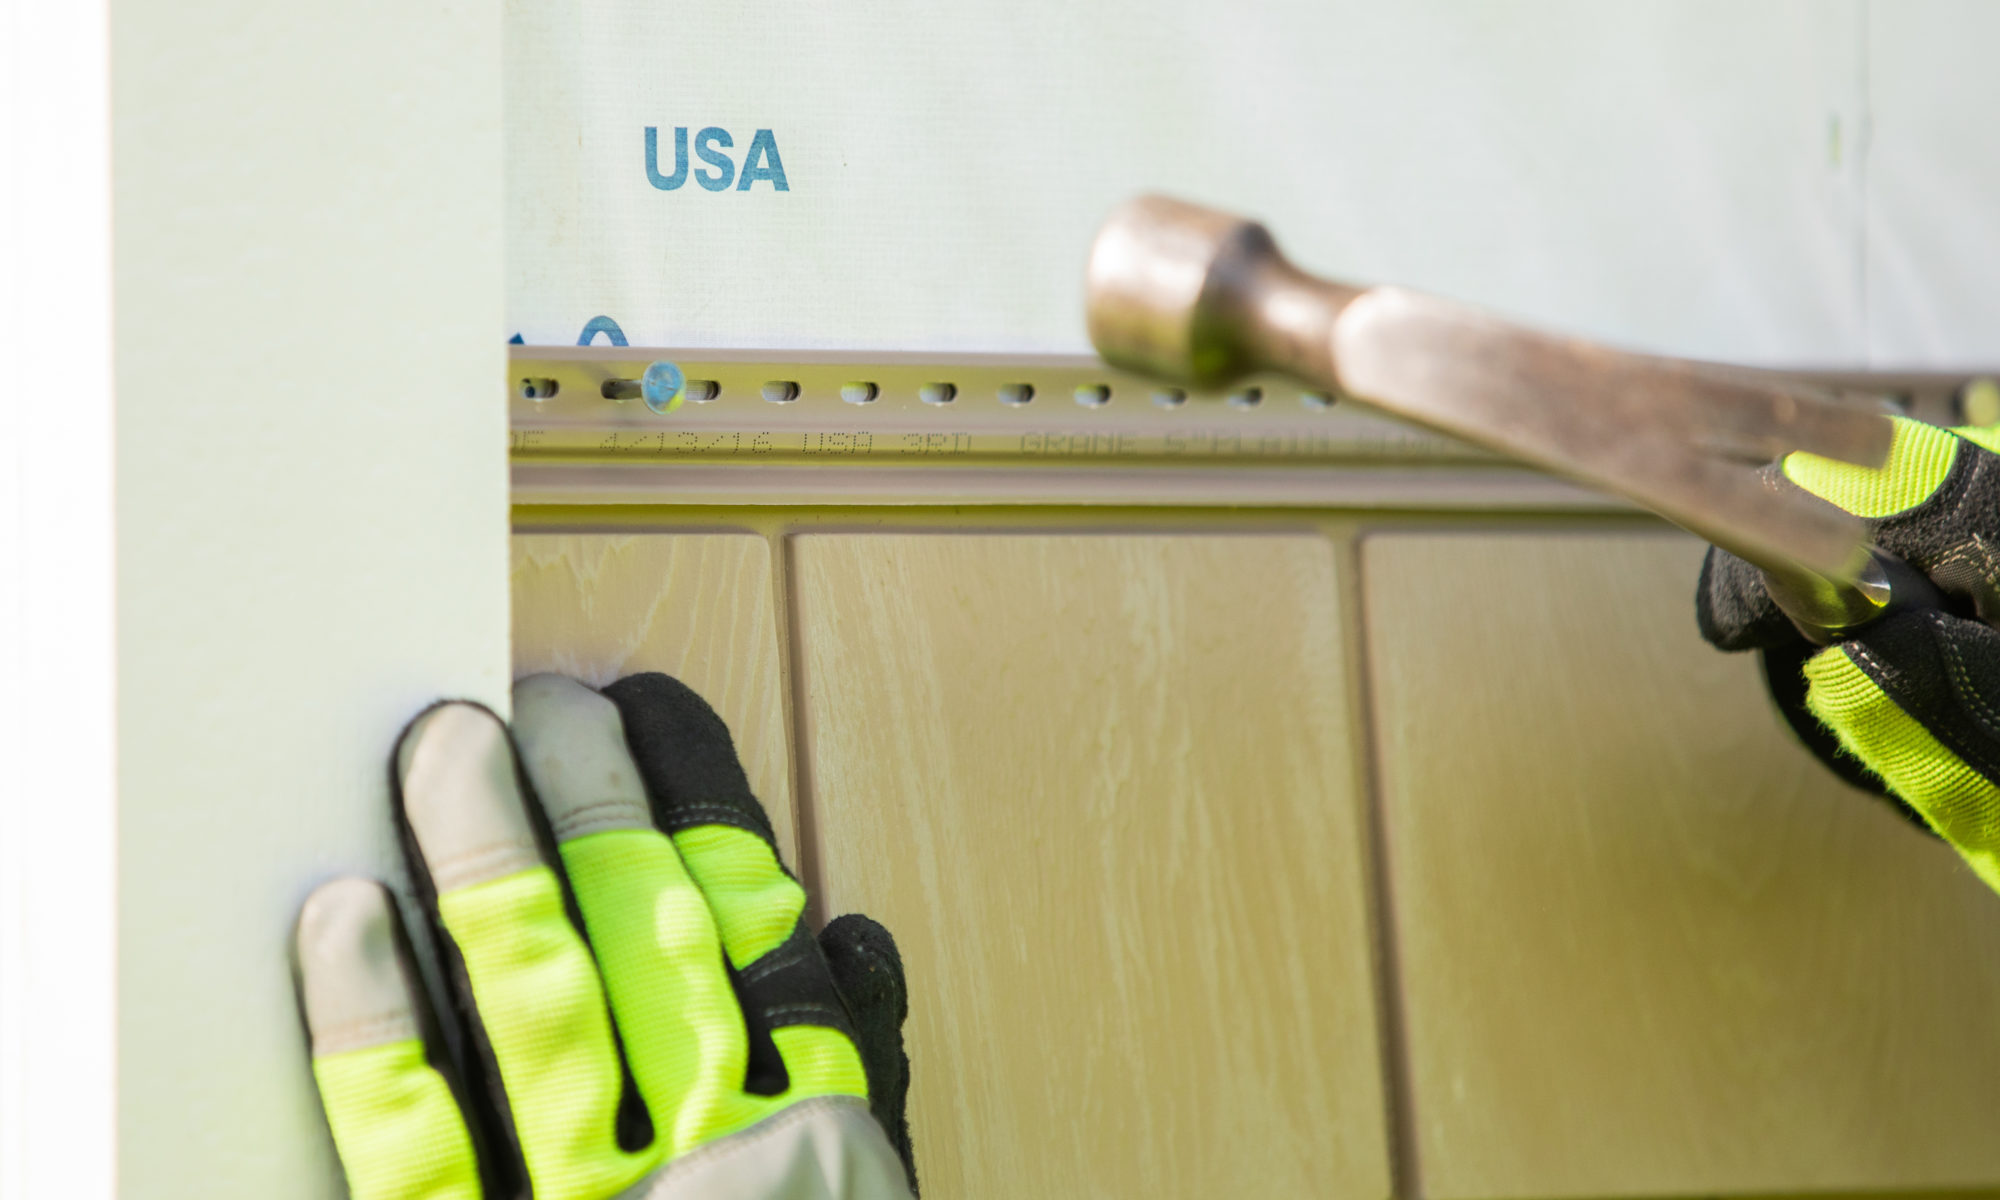
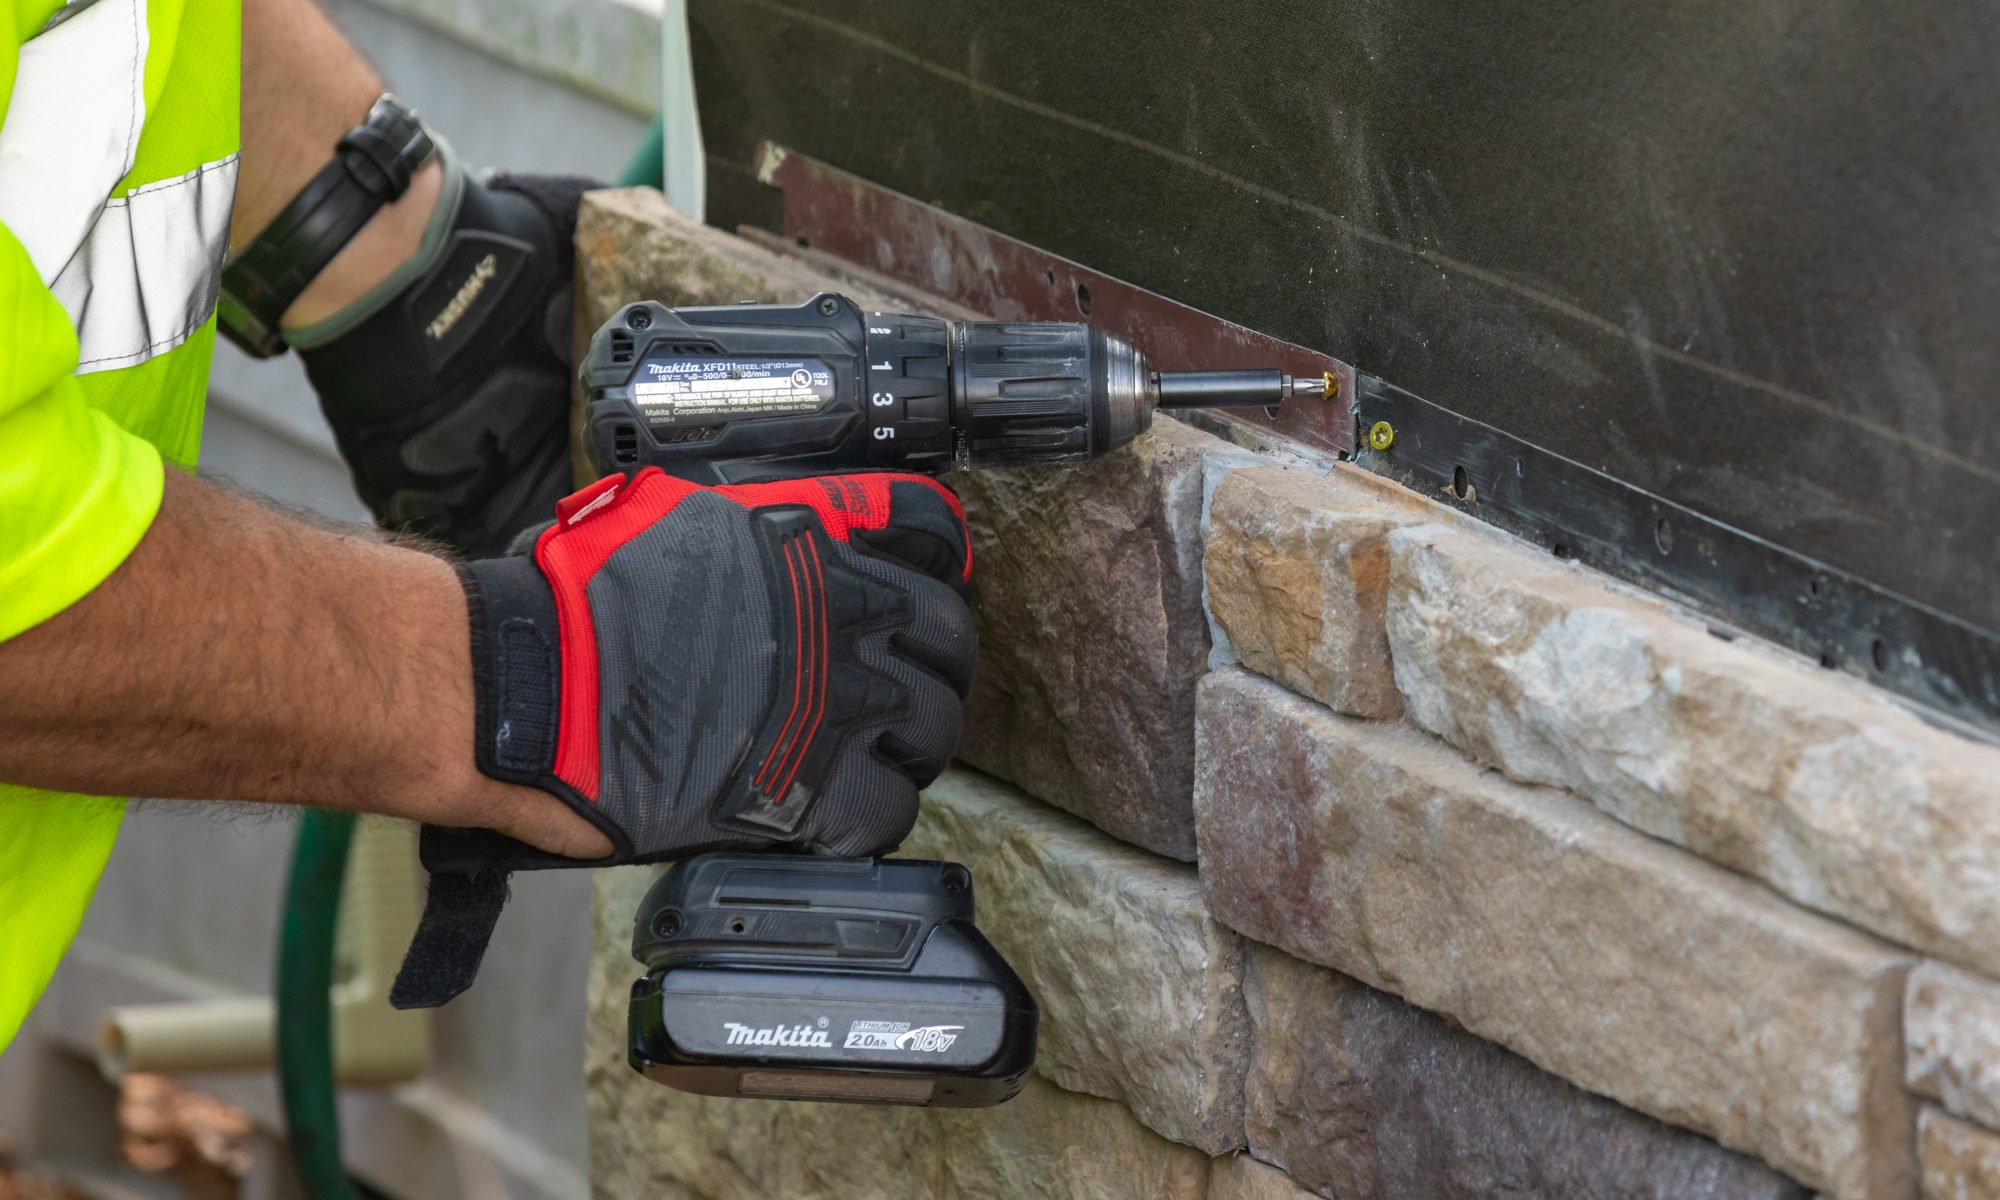
• Nail vinyl siding panels properly: Most vinyl siding panels come with elongated nail slots. Drive the nail in the middle of the slot. Nail it loosely—leaving about a dime’s width between the fastener and the vinyl. Both of these practices will provide room for movement as the panel expands and contracts. Standard nail spacing is 16 inches on center, or 8 or 10 inches for high-wind areas; follow manufacturer instructions for nail type and spacing.

• Maintain a gap at ends: Vinyl siding should be installed with a gap at the end of the wall to accommodate expansion and contraction; make sure there is sufficient room to grow—a ¼-inch gap when installing in temperatures above 40 degrees F, and a 3/8-inch gap when installing in temperatures below 40 degrees F. Because of this, install J-channel trim to hide the gap as the panels contract.  

• Use care with top panels: It’s tempting to cut top panels to fit and then fasten them directly to the wall without the nailing hem. But this technique won’t leave room for expansion and contraction, and it also can trap water and block air movement that’s essential for keeping the wall cavity dry. Best practice is to install finish trim (also called sill trim or utility trim) at the top, cut the vinyl siding panel to height, and use a snap-lock tool to cut lugs to snap the panel into the trim. This holds the panel in place while still allowing for movement.

• Don’t ignore vertical installations: The use of vertically installed vinyl siding across the entire wall continues to grow. The same principles apply—nail loosely and leave proper gaps at top and bottom. Hang the siding from top to bottom, with the top nail in the top of the slot and the rest in the middle.

Following these simple steps, along with the other requirements in your vinyl siding installation instructions, can provide freedom of movement for the cladding, helping to ensure aesthetics and performance that last.

For more details, download the installation instructions for each of Westlake Royal Building Products’ siding brands, starting here. Also, check out the Vinyl Siding Institute’s Certified Installer program.

7 Best Practices for Installing Stone Siding

Versetta Stone, installing stone siding

Versetta Stone™ panelized stone siding combines the timeless look of stone with an easy-to-install format suitable for pros and DIYers alike. It also can be supplied at traditional lumberyards with your other exterior materials.

Much like a traditional siding panel, Versetta Stone features an integrated nailing flange through which it is fastened to the wall—no mortar, scratch coat, or metal lath required. Each lightweight panel covers 2 square feet and features a built-in rainscreen.

Full instructions should always be followed and can be found here. In addition, here are a few best practices and key steps to keep in mind to ensure Versetta Stone looks and performs at its best:

Plan ahead: Versetta Stone’s Ledgestone and Tight-Cut profiles are made from 20 different master molds that can be flipped, allowing for 80 square feet of wall coverage without visual repetition. Still, it’s important to plan your layout ahead of time to avoid repetition and visible seams. Ensure your seams will stair step by staggering each course a minimum of 8”. Versetta’s Universal Corners ensure corner intersections also have a finished appearance; follow the installation instructions for a staggered left-right installation to achieve an authentic look.

A recent Versetta Stone installation demonstrates a stair-step approach to stagger seams.

Mark studs ahead of time and be sure to hit two studs per panel.

Consider black housewrap or felt paper when to help further disguise seams.

Keep it level: Just like any siding installation, verify your courses are level often.

Brush away dust: When cutting, debris can sometimes land in the panel grooves. Be sure to brush it out to ensure the tongue-and-groove panels nest together properly and your courses stay level.

Drive fasteners straight and flush when installing stone siding to ensure proper performance.

Create smooth transitions: When installing stone siding half-walls for a multi-textured facade, Versetta Stone’s wainscot cap/sill can create an ideal finish and transition from the stone to the cladding above. The wainscot includes the same nailing fin as the siding for easy installation. Install flashing over the nailing fin and then shingle the other cladding over top to ensure water sheds off of the sill. Leave a small gap between the cladding and the stone, per each cladding’s installation instructions.

Adjust for continuous insulation: If installing Versetta Stone over foam insulation boards, it’s best practice to install an additional layer of sheathing on top of the foam tied back to the studs. You will need to use longer fasteners to accommodate the additional two layers. Consult this Technical Evaluation Report for fastener requirements.

Learn more about Versetta Stone installation by downloading the full guide here and by watching our YouTube video series, starting here with Chapter 1.

8 Quick Tips to Work Efficiently

As labor challenges abound and schedules remain tight, trimming inefficiencies out of your installation processes can add up to critical time and money savings. Every contractor has their tricks for eliminating wasted steps without sacrificing a quality install. Here are a few best practices to work efficiently.

1. When installing vinyl siding, be sure to leverage available accessories that can reduce detail work while ensuring a finished look. These include:
• Dual undersill trim: This is used the same way as standard finish trim, such as under windows or at the top of the wall, but because it has two slots instead of one, there’s no guesswork as to whether you need to bump out the finish trim to keep the siding angles correct.

• Board and Batten Trim: Use this to separate the courses of vertical siding since the profiles can’t overlap at the seam. The Board and Batten Trim has built-in flashing, making installation easy as well as functional.

• Shake Finish Trim: Designed for Westlake Royal Building Products’ Portsmouth Shake Panel, Shake Finish Trim secures ripped panels under windows and doors or at the top of a wall. Use a snap-lock tool to create snap lugs about every 6” to 8”, then snap the panel into the Shake Finish Trim and lock the snap lugs into place securely.

2. If you have a damaged vinyl corner, you can replace it without removing any siding. Cut and remove the existing face, leaving the channels. Cut and remove the face of the new corner, leaving the return. Then snap the new corner over the channel of the old.

3. When installing CraneBoard® Solid Core Siding® insulated vinyl siding, keep the ends of the foam no more than ¼” from each other to retain the insulation value, while giving the panels enough room to expand and contract. Pull and use your measurements from the foam instead of the panel. Both the panel and the foam will be the correct length.

4. For deck stairs, Fulton Fine Woodworks created a wooden jig that fits between the deck boards and shows precisely where to pre-drill for screw placement, eliminating the need to measure. See it here.

5. Need to find center but working with an uneven number? Simple rotate your tape measure, like so: https://www.instagram.com/p/CfnFg3lJAHT/

6. Tim Uhler, lead carpenter at Pioneer Builders, often creates makeshift tools that can do tasks more quickly while reducing user strain and fatigue. For example, instead of bending to cut sheathing while framing walls on the ground, he mounted a floor scraper to a router with spiral bit: https://www.instagram.com/reel/CcuBh83gBzS/?utm_source=ig_web_copy_link

7. To lift heavy beams into place, Uhler made a beam wrench out of plywood: https://www.instagram.com/p/CZIt_NnKiU3/

8. When painting trim, Robert Cripps Construction sprays aerosol hairspray on the painters tape, helping to prevent bleed-through.

Want more pro tips to work efficiently? Check out our compilation on Instagram. Have a tip that can help others in the trades? Post it to Instagram and tag us at @WestlakeRoyalPros.

Videos: How to Install Foundry Grayne Shingle Siding

Foundry’s Grayne Shingle Siding not only offers a beautiful aesthetic that replicates the look of cedar, it’s easy to install with minimal waste.

How easy? Check out our new three-part video series where contractor and educator Mike Sloggatt outlines the steps and best practices along the way.

Chapter 1: Getting started

Learn how to mark reference lines, including using a story pole to reference off the control line, preparing outside and inside corners and flashing, and installing the starter strip

https://www.youtube.com/watch?v=CNnAAU2e0ao

Chapter 2: Layout

In this part, learn how to offset the panels to avoid repeating patterns and best practices for cutting panels.

https://www.youtube.com/watch?v=wrfJ7BpiLGE

Chapter 3: Installing the Panels

Learn how to install the panels, including preserving the offset pattern, proper gapping, locking in the panels, and proper nailing and nail placement, as well as installing inside corners and starting on an adjacent wall.

https://www.youtube.com/watch?v=b8i7egtIwAw

Learn more about Foundry Grayne shingle siding here.

5 Trim Tips & Tricks From Carpenter Mike Sloggatt

TruExterior Trim

If you’ve been to the Builders’ Show, the Remodeling Show, or JLC Live, you’ve likely crossed paths with longtime carpenter Mike Sloggatt. Armed with a headset and a career’s worth of knowledge, Sloggatt, owner of Mike Sloggatt Home Improvement, delivers compelling presentations on siding and trim installation focused on ensuring quality exteriors that stand the test of time.

Among the materials Sloggatt installs during workshops is Boral TruExterior Siding & Trim. “TruExterior is virtually indestructible in terms of water, insects, and holding paint,” Sloggatt says. “But don’t get lazy—install it properly, and it will treat you really well.”

Along with the installation techniques provided by Boral, here are a few of Sloggatt’s best practices and quick tips for installing TruExterior Trim to ensure a quality—and efficient—installation:

  • Stay organized: Thoughtful setup of materials ahead of time can save you steps over the course of the day. Sloggatt, for example, sets up his cutting station and always works from the same direction—pulling a piece off the stack to the left, cutting, and stacking to the right for installation. To help keep the cutting space clean, he puts a canopy over the saw with a garbage bag behind it for easy disposal of scraps, and he keeps a small battery-powered leaf blower nearby to blow away dust and keep his tooling clean so it will last longer.
Mike Sloggatt
Mike Sloggatt gives a TruExterior Siding & Trim demo at the International Builders’ Show.
  • Use the right tooling: TruExterior offers the workability of wood, which allows it to be routed and shaped into a range of decorative profiles. It does, however, require carbide blades and bits, and it can be difficult to cut wood once those blades and bits have been used for the poly-ash material. Sloggatt designates bits and blades specifically for TruExterior, marking them with blue spray paint. This ensures the tooling will last longer and eliminates any frustration that may result from trying to cut other materials after TruExterior.
  • Understand your materials and think of the system: When Sloggatt first started building 40 years ago, resilient old-growth timber was common for framing—and much more forgiving. Today’s wood materials need to be better protected from moisture and managed as a system. How well the window is trimmed, flashed, and integrated with the weather-resistive barrier can impact the integrity of the wood framing underneath as well as the trim above.
  • Store properly: TruExterior offers superior dimensional stability compared to most materials, but every product is prone to some movement if exposed to the right conditions. As with any trim material, keep TruExterior off the ground and covered during storage so that it won’t risk being installed wet. Once installed, TruExterior can be in contact with the ground with no concerns about excess moisture absorption.
  • Avoid flashed nail holes: One challenge every installer has likely faced is driving a fastener into painted trim and filling the hole, only to leave a noticeable flash behind. To avoid this, Sloggatt puts a small bit of blue painter’s tape over the spot before driving the fastener, then fills the hole with the tape still in place. This ensures the hole is filled but not the surrounding material, eliminating the glare of a flashed hole.

Want to learn more about TuExterior installation? Download the installation guide here.

How to Install Versetta Stone

Versetta Stone installation

Versetta Stone offers the best of both worlds: The beautiful, timeless look of stone along with panelized installation that’s within reach of nearly any contractor or experienced DIYer.

Much like a traditional siding panel, Versetta Stone siding features an integrated nailing flange so it can simply be nailed or screwed into the wall. And unlike regular stone, there’s no need for mortar, scratch coat, or metal lath.

How easy is it to install Versetta Stone? It breaks down into the basic steps below:

  1. Gather your tools: You’ll need a hammer or screw gun, a circular saw, hand grinder, level, chalk line and tape measure, tin snips, brush, small screwdriver, masonry chisel, and a chop saw with continuous diamond turbo blade. You’ll also want to wear safety glasses or goggles, an N-95 mask, gloves, ear plugs or muffs, steel toe boots, and a hard hat.
  2. Estimate materials: Using provided formulas, calculate the area to be covered and how many panels are needed, along with corners, starter strips, and fasteners.
  3. Inspect and prep the area
  4. Mark your starting point and level lines
  5. Install the starter strip and, where needed, J-channel
  6. Install panels:
    • Install panels from the bottom to the top, one row at a time, lapping in a shingle fashion so the tongue seats completely in the groove.
    • Use screws with 3⁄8″ minimum head diameter and ⅛” shank with a length to penetrate the framing at least 1”.
  7. Install universal corners
  8. Install wainscot cap/sill and receptacle/light boxes if needed for the application. Use flashing, metal lath, and adhesive to affix receptable and light boxes.
  9. Clean dust with water and nylon bristle brush

Be sure to follow full manufacturer instructions to install Versetta Stone. For the complete step-by-step guide, download the Versetta Stone Installation Instructions here.

Watch a Versetta Stone wall installation:

https://youtu.be/f_Am_y6n5ZY

Versetta Stone comes in three profiles—Ledgestone, a traditional dry-stack look; Tight-Cut, which features the look of cut-and-fitted stone; and modern Carved Block, offering the look of split-face stone.

Ready to buy Versetta Stone? Find a retailer here. Have installation questions? Contact our customer service department here.

A Simpler Method for Installing Stone Sills

Stone sills can be a hassle to install—from propping them up while waiting for mortar to dry to dealing with wasteful breakage. No matter what type of stone you’re installing, Versetta Stone sills can provide a simple solution.

Versetta Stone panelized stone sill/wainscot cap

Like Versetta Stone stone siding, Versetta Stone sills feature a panelized format that installs easily with nails or screws—no more holding them in place with mason ties while you wait for the mortar to dry.

Simply follow these steps:

  • Remove the alignment tab from the bottom of the Versetta Stone sill product with a masonry chisel or hammer.
  • Apply a layer of mortar to the top of your installed veneer stone with a mortar tube or trowel. 
  • Secure the Versetta Stone sill to the wall with nails or screws, ensuring the bottom of the sill is in full contact with the layer of mortar below. Lap the weather barrier over the flange.

The sills’ simplicity doesn’t mean sacrificing aesthetics. Versetta Stone offers an authentic look and feel in a range of color options—Taupe, Stone Grey, and Charcoal—to perfectly accent your choice of stone veneer. And since Versetta Stone sills come in longer 3’ lengths, there are fewer seams than traditional sills.

Versetta Stone sills measure 36” by 3.5” with a 2.6” exposure and 3” thickness.

Stone Facades Made Easy

Versetta Stone sills offer the same convenience and aesthetics as Versetta Stone stone siding. Along with panelized installation accessible to siding contractors or carpenters, the lightweight stone siding panels feature a tongue-and-groove system for perfect spacing and a built-in rainscreen. The siding carries a Class A fire rating, passes freeze/thaw testing, and is wind resistant up to 110 mph.

Along with sills, Versetta Stone accessories include light and receptacle boxes, J-channels and starter strips, and universal corners. Together, Versetta Stone accessories make it simple to create a fully finished look without extra hassles or wasted time. Every component works as a system with the stone siding panels and is made with the same premium materials and in coordinating styles, colors, and textures.  

Click here for more information on Versetta Stone.

3 Steps to Protecting the Wall Cavity Against Moisture Intrusion

Grayne siding

Protecting against moisture damage not only requires a dependable siding product, but also smart design behind it. Whether through leaks or condensation, water infiltration is nearly impossible to avoid, so taking the steps to eliminate moisture throughout the entire building process is essential.

As all pros know, when water does accumulate, it can wreak havoc on a home’s structure. Wood products, including framing elements, can degrade from excessive water exposure, insulation can soak up moisture, and rot and mold will occur.

How to Avoid Moisture Damage

It is key to have or create an airflow cavity on the back side of the siding you’re installing in addition to proper flashing and weather-resistive barriers (which is designed into most polymer-style siding products like Foundry and Grayne). This stops moisture from getting trapped and causing potential issues during freeze/thaw and/or mold issues.

Here are a few steps to take to help protect the wall cavity from moisture. (Note: Always consult your local building code for the installation requirements for weather-resistive barriers, caulking, etc.)

Step 1: Properly install flashing

Flashing prevents water intrusion around any penetrations through the siding, including channels, corner posts, windows, and vents. Before installing flashing, ensure the wall surface is flat and level.

If you are working on an exterior with existing siding, the best practice is to strip away the old siding for a smooth surface—even when working with vinyl that is designed to be installed directly over wood.

When installing flashing around a window, follow these steps to prevent water leakage:
1. Apply flashing on the underside of the window first.

2. Follow this application with flashing on the sides of the window. Make sure to overlap the bottom flashing.

3. Finally, apply the flashing at the top of the window.

It is crucial that flashing extends past the nailing flanges of any accessory to prevent water infiltration through the opening. The flashing should be long enough to direct water over the nail flange of the last course of siding. This installation method can also be used for applying flashing to other openings, such as electrical outlets and doors.

Flashing around the window

Step 2: Install a weather-resistive barrier

After properly installing flashing, you should next apply a weather-resistive barrier (WRB). Installed between the sheathing and siding, a WRB blocks any water that penetrates the siding and helps it drain away from moisture-sensitive materials like wood structural sheathing and studs.

Not only do WRBs drain water away from the building, they also allow wall assemblies to dry out naturally. Because standard vinyl siding hangs loosely on the sheathing, air is able to flow behind it, creating a drainage gap and method for drying.

To properly install the weather-resistive barrier for maximum protection, the material should be installed shingle fashion by overlapping successive layers behind the exterior finish and over the structural sheathing. Installers should begin installation from the bottom up.

Each overlap should be several inches long. If heavy winds and rain are common in your region, overlap approximately 6 inches at horizontal joints and 8 to 12 inches at vertical joints.

Step 3: Caulk siding correctly

Many professionals rely on caulking to fix mistakes and speed installation time, but caulking can break down over time and eventually even hold water in rather than aid in keeping it out.

To ensure the caulking aids in moisture protection, avoid these three common mistakes:

1. Caulking the top cladding board to trim boards. This traps humidity in the walls.

2. Relying on caulking to fill in gaps. Cut siding to the precise measurements necessary to avoid gaps.

3. Caulking underneath the bottom flange when installing windows. Caulk here will trap moisture inside.

Have more questions about how to properly install Grayne and Foundry siding? View Grayne product resources and Foundry product resources for installation guides, FAQ, and more.

4 Best Practices for Beautiful Siding Installation

Professionals know it’s not only the quality of the product that determines how polished a home’s siding looks, but also how well it is installed.

While having on-site experience can develop the skills for top-notch installation, sometimes even the most experienced builders make mistakes. Here are four tips to ensure your Grayne and Foundry siding projects are beautiful every time.

1. Use the Right Tools
Before you begin the installation process, it’s essential to be equipped with the right tools. Accidentally using the wrong tools can have consequences.

To cut the siding, use either a vinyl siding blade or a fine-toothed blade. If using a fine-toothed blade, be sure to install the blade in reverse for the best cuts.

Other tools to include on your checklist:
• Utility knife
• Caulking gun (to seal J-channel)
• Vinyl siding snips (to cut or trim siding panels)
• Siding removal tool
• Snap lock punch (to cut snap lock tabs and allow cut panels to be snapped into utility trim)
• Nail hole slot punch (to add nail holes if a panel must be face nailed)
• Trim nail punch (to add nailing holes if a panel must be face nailed)

2. Start with a Smooth Surface
If the surface beneath the siding is uneven, even the best siding installation may be compromised. Take appropriate precautions to ensure a smooth, continuous surface.

For new construction, avoid using green lumber as the underlayment, as it typically has high levels of moisture. As the wood dries, it will shrink, leading to cracking and warping. These flaws in the wood can make the siding look uneven and poorly installed.

If you are re-siding a building, furring or complete removal of uneven original siding may be required to create a smooth surface. While this process may seem like a nuisance, it will help to ensure straight, stable replacement siding.

3. Plan for Expansion and Contraction
To accommodate expansion, see siding manufacturers’ guidelines, as many panels install differently.

Always leave a minimum of 1/8″ gap at the nailing hem to accommodate changes from temperature shifts. If you’re installing siding in temperatures of 75 degrees F or higher, lessen the clearance slightly to at least a 1/16″.

vinyl siding installation panel spacing

4. Apply Panels Correctly
One of the most common mistakes installers make when applying panels is driving the head of the fastener tightly against the nail hem. Allow approximately 1/32″ (roughly the thickness of a dime) clearance between the fastener head and the siding nail hem.

During installation, avoid face-nailing or stapling through siding. Face-nailing can not only cause ripples in the siding, but also prevents proper expansion and contraction.

When installing a siding panel, push up from the bottom until the lock engages, then let the panel relax down against the ledge of the previously installed panel. Without stretching the panel, reach up and fasten it into place. Again, be wary of tightness—the panels should not be under tension or compression when they are fastened. Once fastened, allow the butt edge to rest on the top edge of the course below.

vinyl siding installation

To see detailed guides, view our Installation Guides and other product resources:
Grayne: http://grayne.com/resources/

Foundry: http://www.foundrysiding.com/product-resources