Videos: Tapco Tools Accessories That Boost Efficiencies When Working With Trim Coil

Desmond Tse demonstrates Tapco Tools accessories

If you’ve invested in a brake from Tapco Tools, you already know it helps deliver precise, high-quality custom exterior trim. But did you know that there are several Tapco Tools accessories that can make the process even more efficient?

In these videos, follow along as Desmond Tse (aka “The Siding Guy”) walks through how to use several Tapco Tools accessories for siding and trim coil, including the Port-o-Slitter and Brake Buddy.

Introduction to the Port-o-Slitter Tapco Tools Accessory

The Port-o-Slitter offers precise, high-quality slitting and rib forming in a portable, efficient package. Watch as Tse explores what it is and how to use it.

How to Set Up the Port-O-Slitter Stand and Mount Assembly

Follow along with Tse as he sets up and adjusts the stand and mount assembly for the Port-O-Slitter. 

How to Add a Handle to the Tapco Tools Pro Brake

Adding a second handle to your Tapco Tools brake is easy. Learn how to ensure precise placement and attachment in Tse’s video.

Introduction to the Brake Buddy

The Brake Buddy Tapco Tools accessory allows you to increase the style and originality of your trim, producing brick mold trim and decorative ribs from trim coil in just seconds. A measurement guide and quick-twist handle provide for quick adjustments and simple, efficient operation.

In this video, see how the Brake Buddy works and what it can do to increase the style and originality of your trim work.

How To Change Brake Buddy Rollers from Tapco Tools

Ready to try the Brake Buddy? Watch as Tse demonstrates how to change out the rollers.

Eager to learn more about using Tapco Tools brakes, saws, and accessories? View more how-to videos on our YouTube channel and click here to find the right brake or saw for your operation.

8 Siding Tips and Tricks From Solo Installer Desmond Tse

Solo siding installer Desmond Tse, shown here with a Tapco Tools brake, loves giving siding tips on Instagram and YouTube

Whether he’s on a roof or on his siding brake, siding installer Desmond Tse has mastered the art of working smarter, not harder. And he’s built a popular Instagram platform while doing so. Tse, aka @thesidingguy, shares siding tips and tricks to nearly 200,000 followers, teaching other craftspeople how to install vinyl siding (he’s been using Royal® siding throughout his career) and create custom trim more efficiently.

A Long Career Leads to Endless Siding Tips

Tse is a solo siding installer, but it wasn’t always that way. “I had 10 of my own crews working 10 projects at any given time,” he explains. “But I realized I really like installing as opposed to managing people and paperwork.”

Once he decided to make the move to being an independent contractor, Tse took a gradual approach, whittling down as his crews only as they voluntarily moved on to other jobs. Today, after several years on his own, he’s further transitioning in size to smaller projects than he used to.

Along the way, he’s picked up—and continues to learn—quite a few best practices and hacks to make his siding projects more effective and efficient. This includes on his Tapco Tools siding brake, where he has perfected bending techniques to the point of presenting workshops to others. 

Solo siding installer Desmond Tse gives siding tips from the roof

Siding Tips to Improve Your Efficiency

Here are a few best practice, tips and hacks for improving your siding skills, as well as your business approach.

Repetition is the key to improving your skills

Using a brake can feel intimidating. The best way to tackle it is repetition, Tse says. “Gather up scraps and practice. Work on a certain profile. That’s how it becomes muscle memory,” he notes.

The same goes for other aspects of the job: “Even when training crews, I encourage repetition. They’d ask to do siding, but first they need to learn J-channel, so I’d make them go do that over and over.”

Sometimes anything can be used as a jig on your brake

@thesidingguy_

Sometimes anything can be used as a jig. In this case I used the 2’ square and a scrap piece of aluminum as a jig. I do have the material stopper for my brake, but since the aluminum was fed with the material arcing down, it was too floppy to use without getting frustrated. I’ve kept most of my scrap pieces of metal with measurements over the years so I can pretty much just grab the appropriate one for that job and bend away. This way my brain doesn’t have to interpret markings on a tape and it keeps it super simple (not that reading a tape is difficult but I have screwed up before thinking I marked 7” when in fact I went an inch to big accidentally). There are many ways to gain efficiencies in every job. Sometimes different methods work equally as well, it’s up to you to decide which way you like doing it while minimizing the chance of possible errors. I’ve tried many ways and this simple jig is one of my go to methods for bending. . . . . . . . . . . . . . . . . #aluminum #aluminumbrake #tapcobrake #aluminumcapping #exteriortrim #edmonton

♬ original sound – @thesidingguy

You can use a brake to make finish trim that provides a hidden fastener system

@thesidingguy_

Here’s a video showing the bends to make finish trim or sill trim. It’s a great way to do a hidden fastener system. It’s basically a double hem. The unfinished edges of the aluminum slips into this trim. The black you see in the video is where it gets fastened. I choose to do 3/4” so that I don’t have to pull out a tape measure or gauge, rather just use the lip of the brake. I hope this video is useful. As always, I’m happy to answer any questions, and sometimes I won’t know the answer but I’ll always try my best. . . . . . . . . . . . . #aluminumbrake #finishtrim #aluminumcapping

♬ original sound – @thesidingguy

A good go-bag can save your time and effort

“One of the items that has helped increase efficiency for me over the years is my ‘go bag,’” Tse says. “This bag stays close to where I’m working at all times and holds all of my ‘just in case’ items. I keep spare fasteners of all kinds, tape, pencil lead refills, nail slot punch, spare tape measure, aviation snips, duckbill pliers, a crescent wrench, a folding tool, chalk line, and a pry bar. … By keeping my tool belt light I have more energy through the day and I don’t have to waste time going to the trailer to grab any items.” (See his go bag in action here.)

Sometimes you can leave your tape measure in your belt

@thesidingguy_

I’ve often suggested to people to only pull out your tape measure if you have to. I sided this entire wall without pulling out the tape until the top row where I pulled it out once to double check if that last row was a consistent height. Holding siding upside down determines all of the length and then cut right in the spot instead of measuring, remembering said measurement then measuring the piece to cut saves a lot of time. Seconds here and there add up to many minutes of time saving. Maybe even an hour throughout the day. That will add up to days in saved time over the year. I didn’t have to move quickly at all to get this wall siding quickly. I had the materials sitting just off screen to the right. I did initially have the box of siding propped up in front of the wall, but it stuck up way too high and I would’ve had to pull up the siding past the eaves just to take a piece out so I opted to have it off to the right. Preplanning makes a big difference in efficiency and ease of a job. Preplanning can be done while driving, or as you initially pull nip to the site and finish your coffee or set up a ladder. Think through things in your mind quickly so that the project goes smoothly every day. Happy Friday all . . . . . . . . . . . . . . . . . #fastsidinginstallation #vinylsidinginstaller #remodel #skilledtradesmatter

♬ original sound – @thesidingguy

Wear your fall protection harness properly

@thesidingguy_

I was in a fall protection certification course today. This video shows my instructor properly performing a partner check. If you’re working solo, check it in your vehicle mirror. It’s always good to have refresher courses. It’s not a legal requirement here, but many builders require you to have the certification to work on their homes. . . . . . . . . . . . . . #fallprotection #safetyharness #workingatheights

♬ original sound – @thesidingguy

Ensure your social media posts add value

If you’re putting your projects and practices on Instagram, Facebook, X, or TikTok, consider what will benefit your audience in terms of both content and delivery. “I’m pretty easygoing, but I’m pretty particular. I try to keep my posts semi-serious but add humor once in a while,” Tse says. “My mentality for anything I post is ‘Is it going to add value?’ And if it’s not, I won’t post it.” (And, yes, sometimes something for just a laugh has value in its own way.)

Siding tips from solo siding installer Desmond Tse: Sometimes it's good to have fun

Not everyone is wired to be a business owner

Owning your own business provides a lot of freedom, but it also requires a lot of heavy lifting when it comes to paperwork, dealing with numbers, and getting and retaining customers. Tse encourages new business owners to be true to their word and to always under-promise and over-deliver.

To learn more siding tips, follow Tse on Instagram at @thesidingguy.

Want more insights from your fellow pros? Subscribe to our monthly enewsletter.

Tapco Tools Solves Roofing Trim Headaches

The Tapco Tools Max-I-Mum brake system for crafting roofing trim

Tapco Tools® brakes are widely recognized for helping contractors create high-quality custom exterior siding trim. But did you know that the versatility and precision of the Max-I-Mum® XL and MX Series® brake systems are also ideal equipment for roofing trim and flashing fabrication needs?

Tapco Tools brakes are efficient, durable, and portable, and they’re engineered to make it easy to accurately craft the ideal roofing trim solution for every job.

The Max-I-Mum XL System (pictured above) combines the Max-I-Mum II brake with a MAX Snap Stand and MAX Cut-off for a powerful-yet-portable commercial-grade braking system. The system weighs as little as 133 pounds but can bend all vinyl; aluminum up to .040, galvanized steel up to 24 gauge, painted galvanized steel up to 26 gauge, soft and annealed copper up to 32 ounce, and stainless steel 1/2 hard up to 24 gauge.

Less portable but no less robust, the MX Series provides heavy-duty bending without sacrificing precision. It’s stable, tough, and has double-walled pivot arms for added strength. The MX can bend all vinyl, galvanized steel up to 22 gauge, painted galvanized steel up to 24 gauge, CR sheet and coil steel up to 22 gauge, soft and annealed copper up to 32 ounce, and stainless steel 1/2 hard up to 24 gauge.

The Tapco Tools MX Series brake system for crafting roofing trim
Tapco Tools MX Series brake

Efficient, Accurate Roofing Trim Fabrication

To give your clients a truly custom, finished look, the Max-I-Mum XL and MX Series can be used to craft a variety of roofing trim and flashing details. These include:

  • Hip cap
  • W-valley flashing
  • Angle 3” by 3”
  • 3/4” angles
  • Drip cap
  • J-channel
  • Monoslope ridge
  • Baseguard
  • Outside corners
  • Narrow outside corners
  • Inside corners
  • Residential eave drip
  • Step sidewall flashing
  • Double angle flashing
  • Transition flashing
  • Gambrel flashing
  • Endwall/sidewall flashing
  • Residential gable trim

See Tapco Tools brakes in action and learn bending techniques on our YouTube channel.

Tapco Tools Brake Donation Will Support Students and Construction Trades in Iowa

Tapco Tools donation

For nearly 30 years, North Iowa Area Community College’s (NIACC) Building Trades Diploma Program has been jumpstarting students into a career in construction. Westlake Royal Building Products is helping boost their efforts with a Tapco Tools brake donation to train the students in the craft of custom exterior trim.

Designed for students interested in a career in residential, commercial, or industrial construction, NIACC’s one-year Building Trades Diploma Program combines classroom instruction (to teach safety, blueprint reading, and craft work processes), manipulative lab projects (a mock jobsite setting where students learn at their own pace), and eight-week mentored jobsite internships. “NIACC Building Trades students will have opportunities for nationally recognized certifications including NCCER, OSHA, and other optional industry-related certifications,” the school explains. “The Building Trades Lab is a state-of-the-art facility where students learn in an individualized, competency-based setting, mastering skills by constructing manipulative projects.”

Though most of the students are just starting their careers—recent high school grads or high school students earning dual credit—the school has participants of all ages. The Diploma Program spans 37 semester hours across three semesters. A Certificate Program (two semesters) and a Fundamentals of Construction (45 hours) also are available, among other related courses.

Part of the program’s current hands-on training is work on a local Habitat for Humanity house. A few years ago, the students participated in an episode of Extreme Makeover Home Edition.

Gregg Helmich, a building trades instructor who leads the NIACC program, says that sometimes graduates go directly into the construction workforce, often by being hired through their internships. For others, it’s a springboard to other programs or more intensive training opportunities. Either way, he notes, the diploma typically leads to a higher starting wage, which helps them stick with it.

Tapco Tools Brake Donation Will Have Immediate Impact

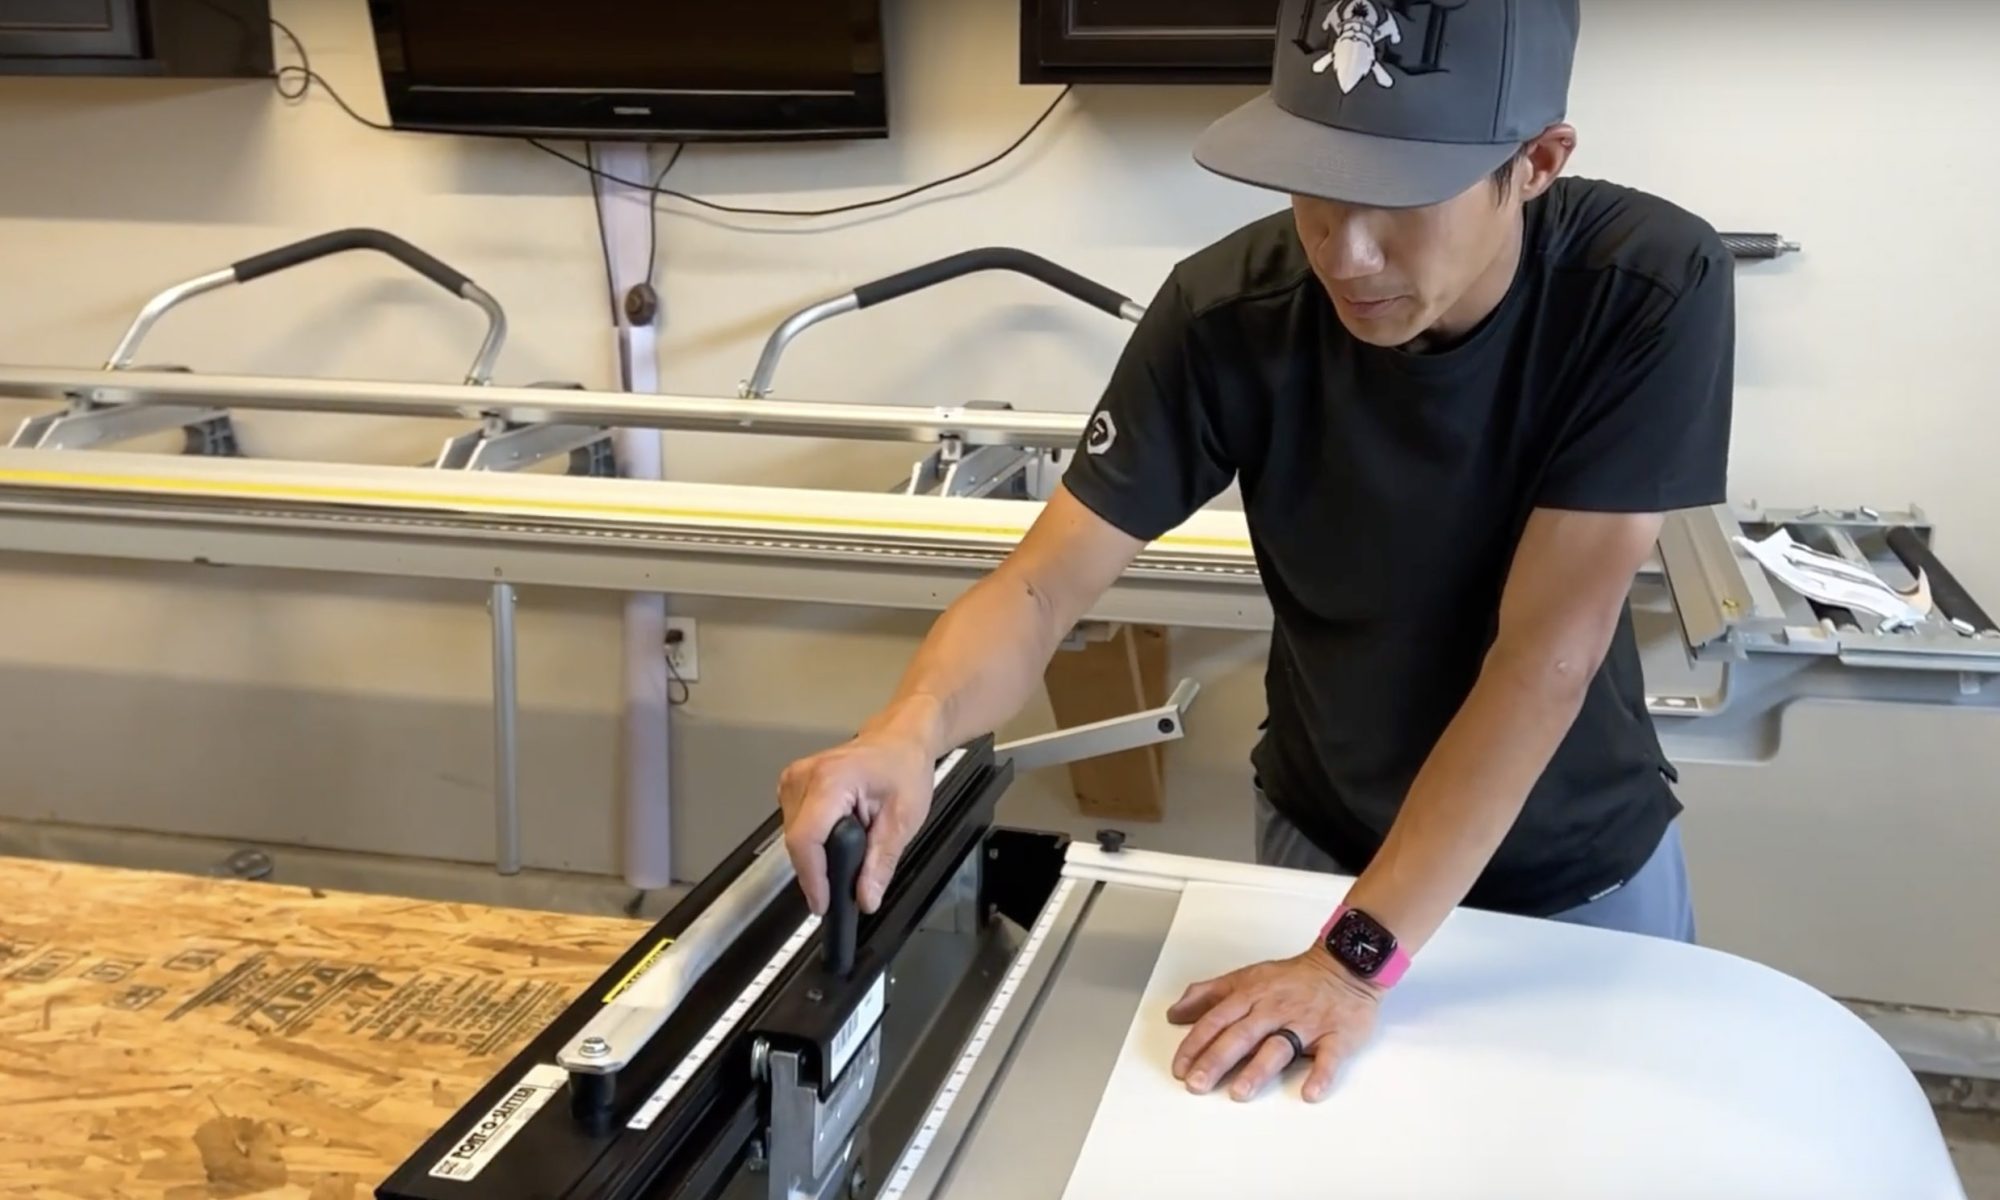
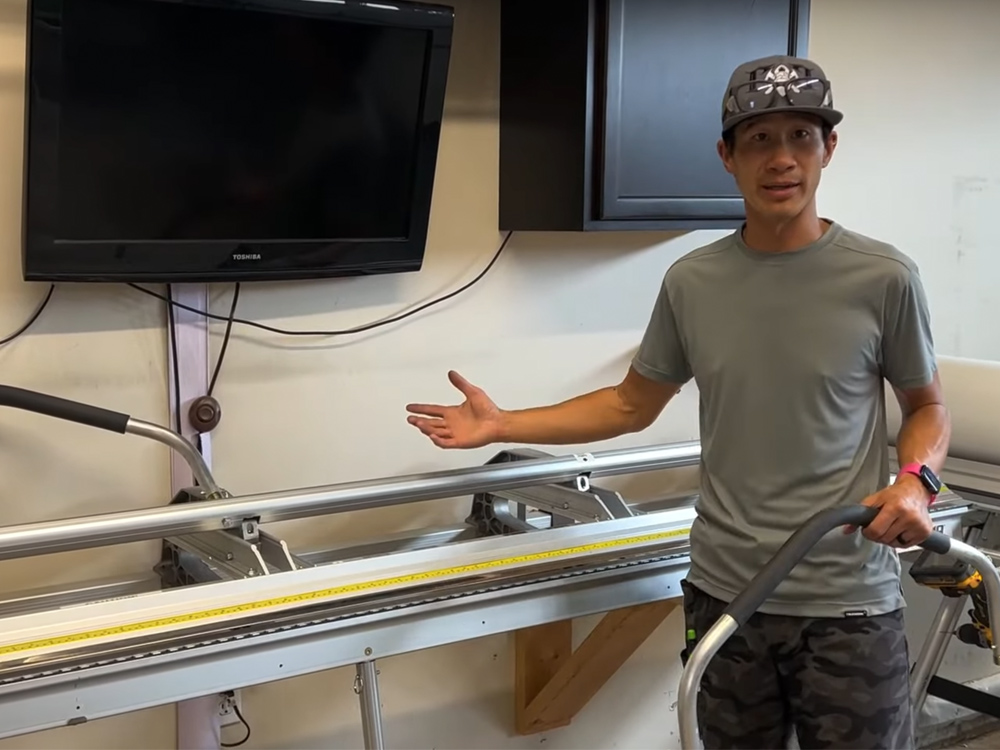
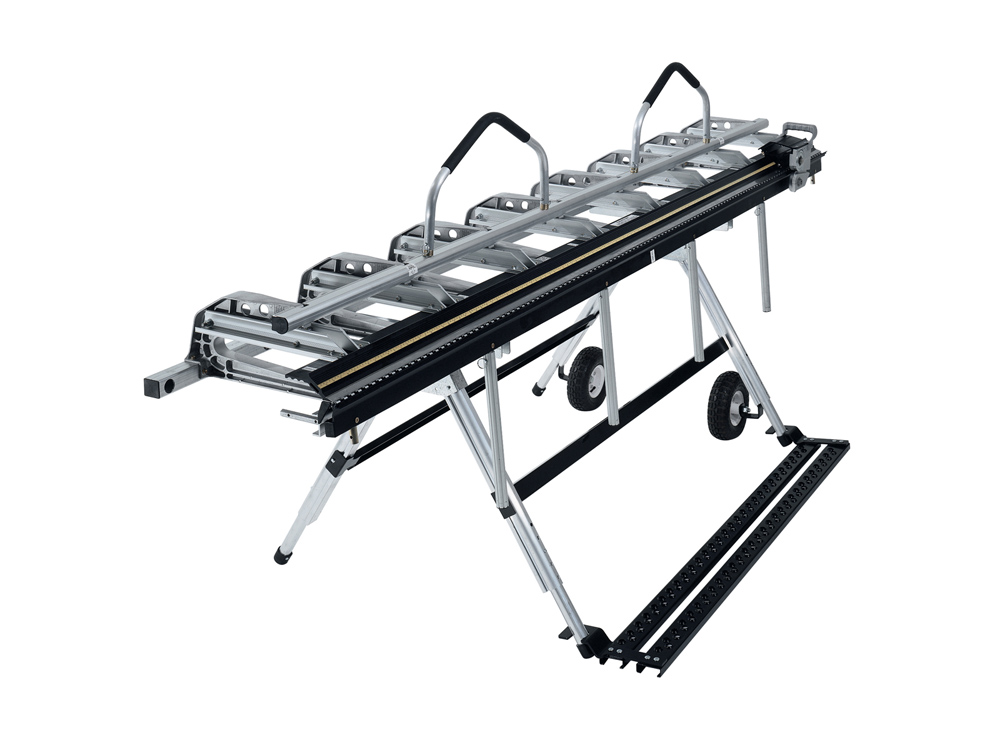
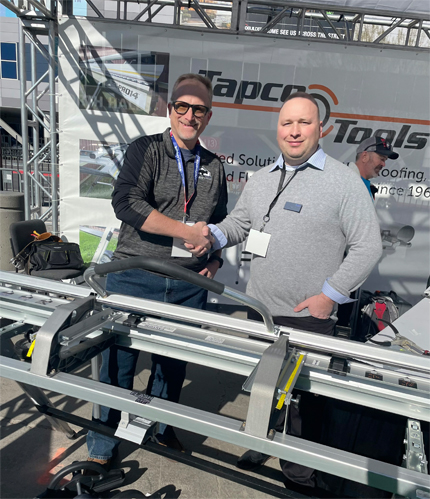
During the 2023 International Builders’ Show, Westlake Royal Building Products handed off the Tapco Tools brake donation, a PRO 14 brake, to Helmich for the NIACC Building Trades Diploma Program. The PRO 14 allows for easy, efficient crafting of high-quality custom trim pieces for siding and roofing applications, including soffit, fascia, brickmold, sill trim, window casing, chimney flashing, and more.

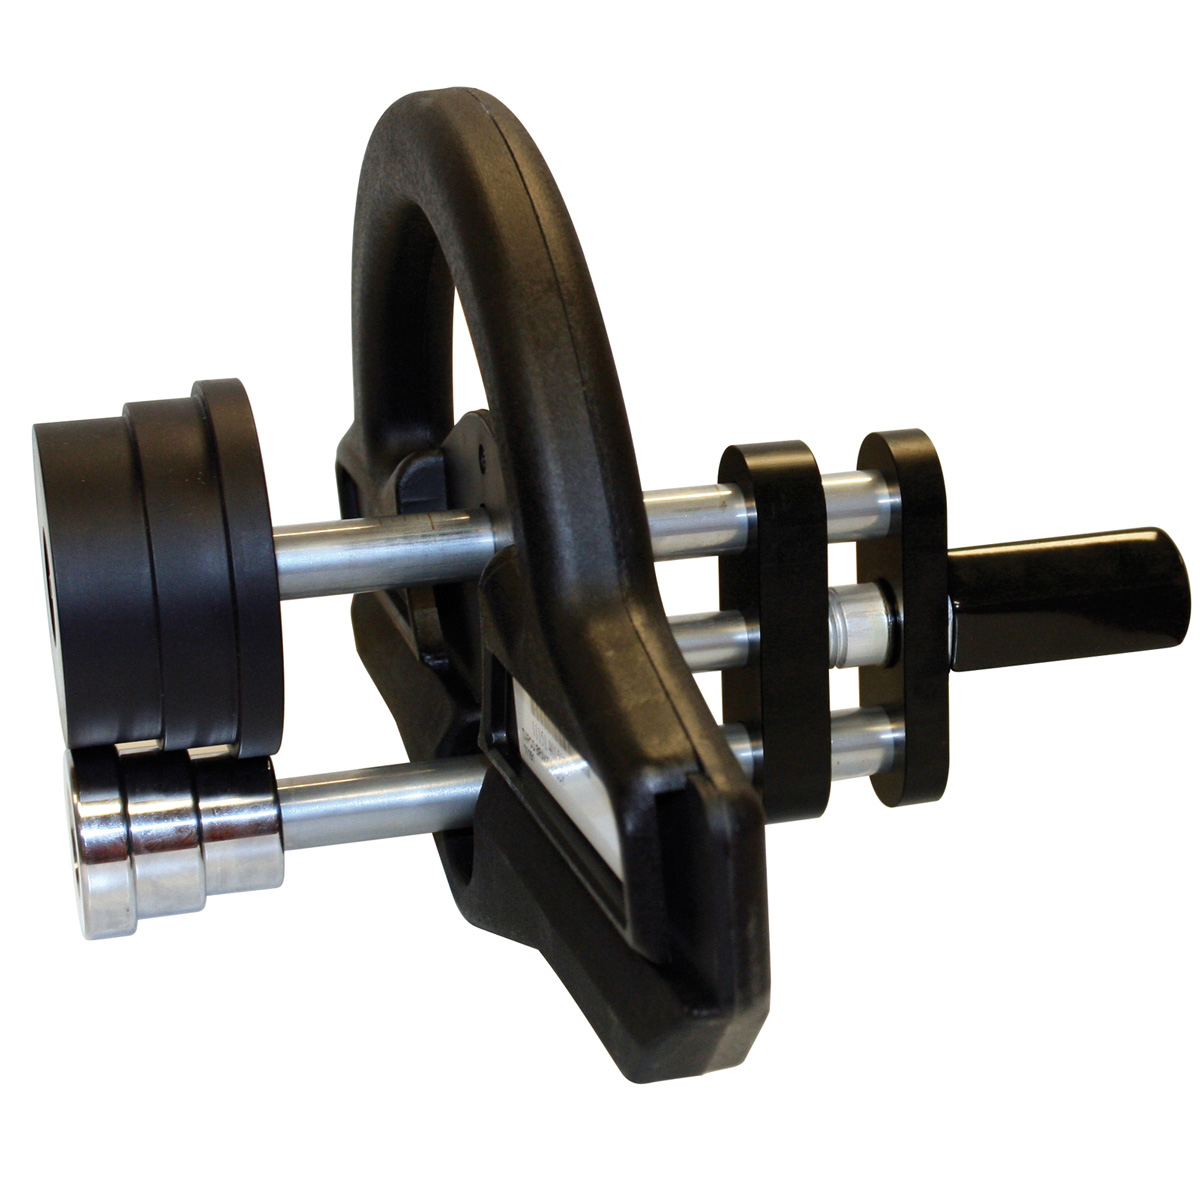
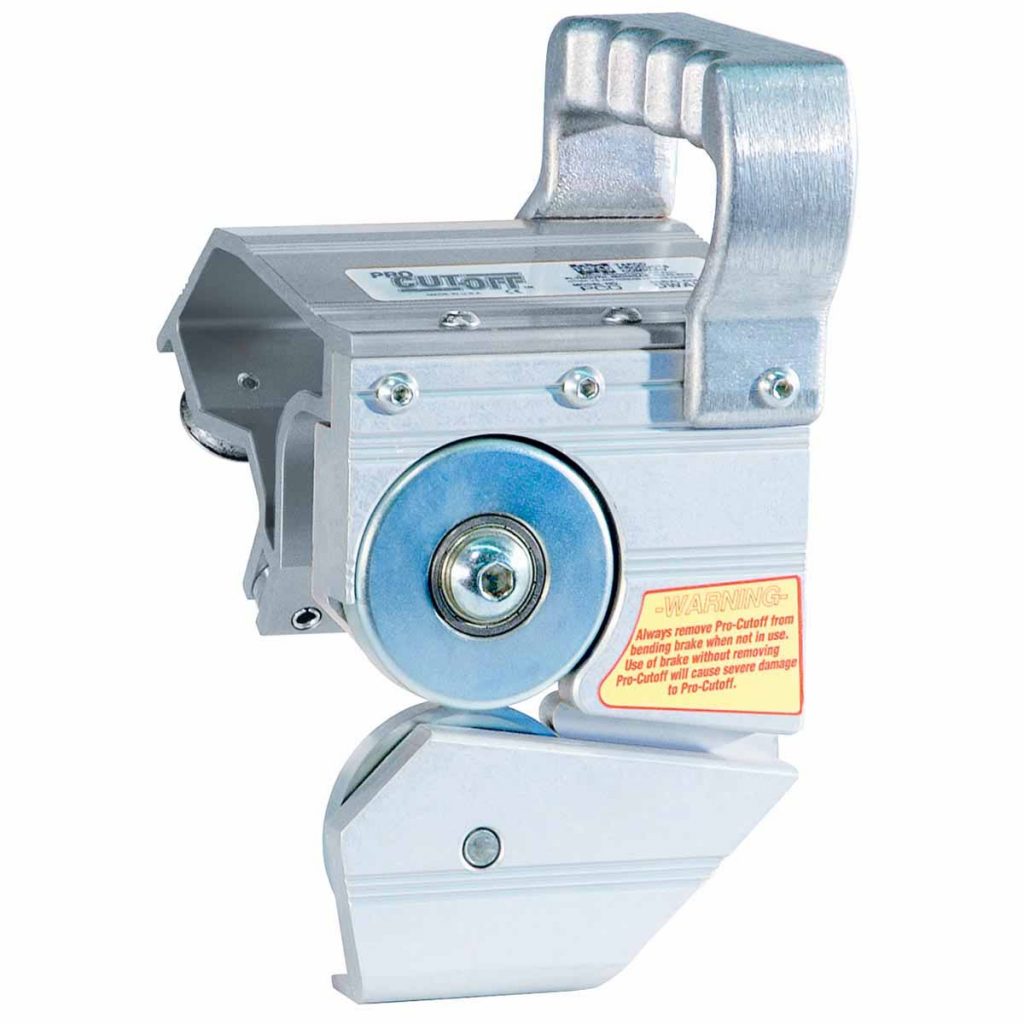
Tapco Tools also donated a Snap Stand; a Side-Winder, which secures the coil to the brake; a PRO Cut-Off for safer, single-pass cutting; and a Brake Buddy, which allows the user to elevate trim work with more style and originality.

“The sky’s the limit to be able to use this in different ways,” Helmich says. “Students love to get hands-on—a video can only do so much.”

Along with fundamentals of custom bending, Helmich says the brake connects students with building science principles. “We’re embracing the building science community … often it asks for flashings that aren’t available in stores, so using the brake is great to create kickout flashing and other things to keep water away,” he explains.

For recruiting purposes, the brakes and other innovative tools come in handy for design/build events at local high schools, where students can see how a simple roll of coil becomes an intricate piece of trim.

The NIACC program has had another Tapco Tools brake for about 20 years that is still going strong. The new brake will allow for the original brake to be used by the program’s regional academies without sacrificing budget.

“I can’t thank you enough,” Helmich says. “It humbles me and gives me an attitude of gratitude to the company to be able to see the value and the importance of skills education.”

The feeling is mutual: “The NIACC Building Trades Diploma Program is doing important work in training the next generation of contractors and preserving the construction craft,” said Adam Clark, Product Manager at Westlake Royal Building Products. “We couldn’t be more thrilled to support their efforts with a new Tapco Tools brake, and we look forward to seeing the students learn and grow in the trades.”

How On-Site Trim Fabrication Can Save Contractors Money

Tapco Tools Brake Buddy

With the cost of materials continuing to be volatile, you may be looking for ways to save money on the jobsite. On-site trim fabrication using a Tapco Tools brake and trim coil can not only provide those savings, but can also be a way to bring in extra money.

Tapco Tools offers a range of brakes suitable for everything from small remodeling shops to commercial projects, helping you achieve a high-quality finish no matter the size of the job. A full line of accessories provides even more versatility.

For example, the Brake Buddy allows you to elevate your on-site trim fabrication with more style and originality, including producing brickmold trim and decorative ribs in just seconds. Suitable for any Tapco Tools portable brake, the Brake Buddy features a measurement guide and quick-twist handle that provide for quick adjustments and simple, efficient operation.

Tapco Tools Brake Buddy
Brake Buddy

For cutting, the Pro Cut Off for Tapco Tools Pro Series brakes provides factory-quality, single-pass cuts of heavy-duty sheet metal, eliminating the need for utility knives and shears. It features an easy-adjust mechanism for versatility and an ergonomic grip for smooth operation.

How Much Can a Brake Save in Material Costs

Crafting your own trim can save up to 36% of the cost of premade trim. Here’s a breakdown:

This spring, the cost of a 6” by 12’ aluminum cedar texture fascia trim from a big box store came to $14.98.

To craft that same fascia in a Tapco Tools brake and the Brake Buddy would cost $9.52 per piece. This includes a 24” by 50” trim coil at $119, which provides 12.5 6” fascia per roll. This results in a savings of $5.46 per piece vs. premade trim.

In addition, bending trim can take place off site and indoors, allowing contractors to work well past dark during winter months or to generate extra income.

Click here to find the right brake for your operation.

Video: How to Make Common Trim Bends on a Tapco Tools Brake

Tapco Tools trim bend

Brakes and saw tables from Tapco Tools offer the utmost precision to create high-quality trim bends for the finished look of custom exterior trim. As the industry leader in premium professional-grade contractor brakes for more than 50 years, our tools and accessories are efficient, durable, portable, and easy to use. Plus, we back it up with robust training and unparalleled customer support.

Here’s a step-by-step look at some of the most common trim bends you can complete on a Tapco Tools brake.

The 4 Most Basic Shapes of Trim Bends:

Some of the most common bends on a brake that can get you nearly anywhere you need to go are hemming an edge, a sill seam, simple (3/4”) step flashing, and tight (1/2”) step flashing.


J-Channel and L-Bends

Making a J-channel on a Tapco brake is straightforward, and creating a window head flashing is a very similar process.

Bending Bay Window Corner Posts

Often, installers will try to stretch a vinyl siding corner at a 22- or 45-degree bay window. Here’s a better solution.

Ready to learn more about trim bends? View more how-to videos on our YouTube channel and click here to find the right brake for your operation.

Videos: M2X and S2X Gauges Speed Up Trim Bends

Tapco Tools, M2X, custom trim, contractor brakes

Tapco Tools’ professional-grade brakes help contractors achieve a high-quality, finished look for custom exterior trim projects. And two accessories—the M2X and S2X—make these tools even more efficient and easy to use.

M2X Measuring Tool Allows for 50% Faster Bends

As its name suggests, the M2X gauge measures two times as fast while eliminating the need for a tape measure and pencil marks for bending.

The M2X measuring tool consists of an onboard measuring tape and two easy-to-attach, moveable brackets with corresponding measurement markings. Where once users had to measure, mark the bends (often front and back), and then move the trim to those marked positions, now they can simply place the material on the brake and move it to the scale on the M2X gauge accessory. The result is as much as 50% faster bending—and no pencil marks or snip-cut marks on the finished product.

Check out this video for an overview of the M2X at work:

https://www.youtube.com/watch?v=1dEbyWFpu_0

Ready to learn more? See how to install the M2X:

https://www.youtube.com/watch?v=USxYUVl2nkg

S2X Material Stop Gauge Speeds Repeat Trim Cuts and Bends

Like the M2X, the S2X material stop gauge is aptly named: It allows for cuts and repeat bends in trim two times faster than traditional methods.

The S2X gauge includes two orange anodized aluminum material stops on two long bar/pivot assemblies adhered with white measuring tape and orange cut-off tape. Slide the stops along the bars to the desired measurement and secure in place with thumb screws; when material is inserted into the brake, the accessory stops the material at the precise spot for an accurate cut or repeat bends—no tape measures or pencil marks required. Along with time savings, the gauge can better ensure accuracy and, subsequently, cleaner installation.

Check out this video for an overview of the S2X gauge:

https://www.youtube.com/watch?v=M0GO3vmbVOs

Ready to learn more? See how to assemble and install the S2X:

https://www.youtube.com/watch?v=UdXUrvtpfbI

Explore the M2X, S2X, and other Tapco Tools gauges here. For a virtual demo, contact us.