Videos: Tapco Tools Accessories That Boost Efficiencies When Working With Trim Coil

Desmond Tse demonstrates Tapco Tools accessories

If you’ve invested in a brake from Tapco Tools, you already know it helps deliver precise, high-quality custom exterior trim. But did you know that there are several Tapco Tools accessories that can make the process even more efficient?

In these videos, follow along as Desmond Tse (aka “The Siding Guy”) walks through how to use several Tapco Tools accessories for siding and trim coil, including the Port-o-Slitter and Brake Buddy.

Introduction to the Port-o-Slitter Tapco Tools Accessory

The Port-o-Slitter offers precise, high-quality slitting and rib forming in a portable, efficient package. Watch as Tse explores what it is and how to use it.

How to Set Up the Port-O-Slitter Stand and Mount Assembly

Follow along with Tse as he sets up and adjusts the stand and mount assembly for the Port-O-Slitter. 

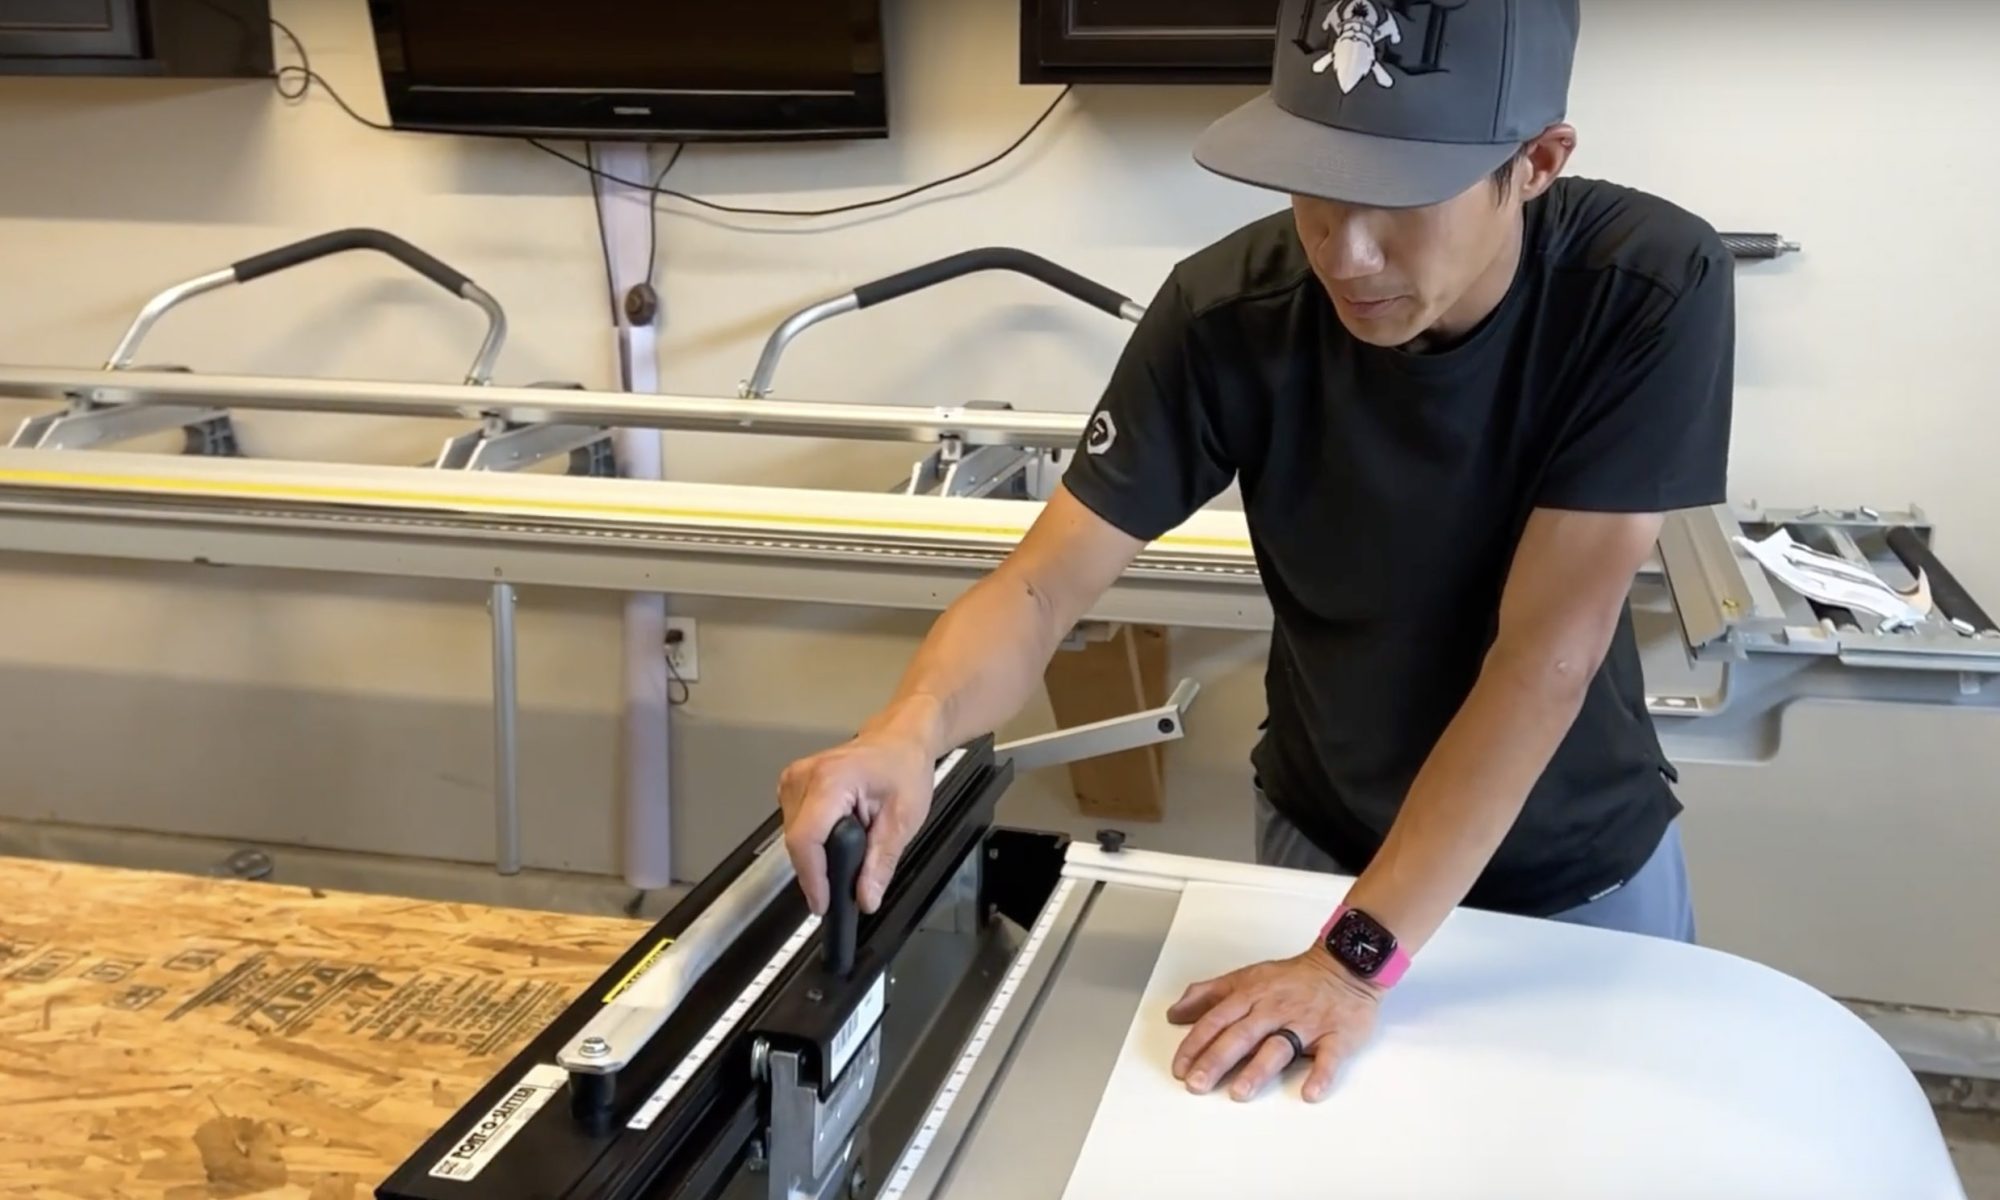
How to Add a Handle to the Tapco Tools Pro Brake

Adding a second handle to your Tapco Tools brake is easy. Learn how to ensure precise placement and attachment in Tse’s video.

Introduction to the Brake Buddy

The Brake Buddy Tapco Tools accessory allows you to increase the style and originality of your trim, producing brick mold trim and decorative ribs from trim coil in just seconds. A measurement guide and quick-twist handle provide for quick adjustments and simple, efficient operation.

In this video, see how the Brake Buddy works and what it can do to increase the style and originality of your trim work.

How To Change Brake Buddy Rollers from Tapco Tools

Ready to try the Brake Buddy? Watch as Tse demonstrates how to change out the rollers.

Eager to learn more about using Tapco Tools brakes, saws, and accessories? View more how-to videos on our YouTube channel and click here to find the right brake or saw for your operation.

Videos: How to Install Foundry Grayne Shingle Siding

Foundry’s Grayne Shingle Siding not only offers a beautiful aesthetic that replicates the look of cedar, it’s easy to install with minimal waste.

How easy? Check out our new three-part video series where contractor and educator Mike Sloggatt outlines the steps and best practices along the way.

Chapter 1: Getting started

Learn how to mark reference lines, including using a story pole to reference off the control line, preparing outside and inside corners and flashing, and installing the starter strip

https://www.youtube.com/watch?v=CNnAAU2e0ao

Chapter 2: Layout

In this part, learn how to offset the panels to avoid repeating patterns and best practices for cutting panels.

https://www.youtube.com/watch?v=wrfJ7BpiLGE

Chapter 3: Installing the Panels

Learn how to install the panels, including preserving the offset pattern, proper gapping, locking in the panels, and proper nailing and nail placement, as well as installing inside corners and starting on an adjacent wall.

https://www.youtube.com/watch?v=b8i7egtIwAw

Learn more about Foundry Grayne shingle siding here.

Video: How to “Be a Good Neighbor” With Vantage Shutters

Vantage shutters

Nothing adds instant curb appeal to a home like the perfect pair of shutters. But those same shutters can detract from the exterior if they’re not maintained properly.

This new video from Vantage sums it up well:

https://youtu.be/8phy30Zf3v4

If your drab exterior is fodder for neighborhood gossip, Vantage shutters offer an ideal solution. Along with adding a pop of color and style to the façade, Vantage shutters are engineered for durability. Made from advanced color-through PVC, the shutters eliminate worries about cracking, peeling, or fading; color lasts for decades without painting. 

And that means less maintenance, a longer-lasting look—and no pesky neighbors on your back. 

Neighbors like these:

https://youtu.be/c1DusU2tt6M

The shutters come in four styles: open louver, raised panel, board-and-batten, and louver/panel. In addition, buyers can choose from a range of accessories, including elliptical arch tops, quarter-round arch tops, transom tops, and decorative hinges and S-hooks. 

See how Vantage shutters can give your exteriors a boost. Visit our inspiration gallery here

Video: Kleer Trimboards vs. Dirt Intrusion

Do your trimboards stand up to dirt?

PVC trim is a low-maintenance alternative to wood. But not all PVC trim is created equal. Over time, some PVC trim products will collect dirt in the edges, leading to a grimy, gray, aged look that can dull the exterior façade.

Kleer Lumber is different. Kleer trimboards feature TruEDGE technology—smoother edges that help the boards resist dirt and, when they do get dirty, make them easier to clean. The result is brilliant white trim that looks great for the long haul.

But don’t take our word for it. Check out this video, in which we put Kleer trim and two other PVC trim brands through a dirt intrusion test to see how they stack up:

As you can see, dirt doesn’t permanently embed itself into the edges of Kleer trimboards, ensuring easier cleaning and a more beautiful finish compared to other PVC trim options.

Kleer Lumber trimboards versus trim competitors

Kleer trimboards also contain UV inhibitors to prevent yellowing, so no painting is required to maintain the original white appearance. Not interested in white? Kleer trim can be painted easily with 100% acrylic latex paint.

To further ensure Kleer trimboards maintain their pristine appearance, they’re wrapped and shipped in KleerPaks. With KleerPaks, dealers can sell smaller quantities without leaving the remaining stock exposed in the lumberyard or warehouse, and builders and remodelers can use the boards they need on the jobsite without worrying about the rest of their product getting scuffed, dinged, or dirty.

Kleer trimboards come in eight widths and in lengths up to 20 feet. And while it offers the look of wood, Kleer trim is resistant to splitting, warping, and checking; it’s straight with no need for culling the pile; and it resists extreme weather conditions.

Ready to be inspired? Visit our Image Gallery or Request a Sample.